Pod owner actions
How to create banner messages and manage administrators. Available to pod owners only
Banner messages and administrator management are only accessible to SEADpod owners. Provisioned administrators will not be able to view or action the following from within SEAD.
Managing banner messages
Pod owner administrators can publish a banner message which is immediately viewable across internal SEADpod owner, administrator and user interfaces. Banner messages are often used to communicate urgent or important messages and can be amended or published as frequently as necessary. To publish a banner message, navigate to the message icon from the side navigation panel.
Note: Banner messages are only visible in the SEAD portal and will not appear in the Windows Remote Desktop client or Windows App.
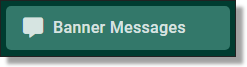
Fig. 1. Navigating to the banner message tab
From the Banner Messages page, type the message you would like to publish in the text bar, then press ‘SUBMIT’.
NOTE: Banner messages can contain up to 400 characters.

Fig. 2. Banner message text bar
Once you have submitted the banner message, you will be asked to confirm the action, click ‘Yes’ to proceed.
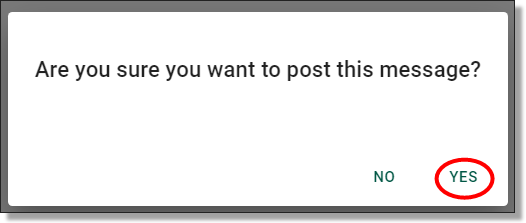
Fig. 3. Banner message publishing confirmation
Once the action initiation is shown as successful, the message banner will appear immediately across all internal SEADpod interfaces within your own SEADpod and is viewable from all pages.
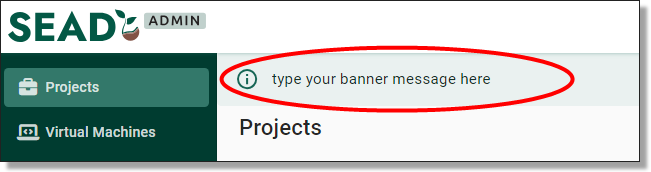
Fig. 4. Published banner message
To clear your banner message, navigate back to the Banner Messages page and click the ‘CLEAR BANNER’ button.
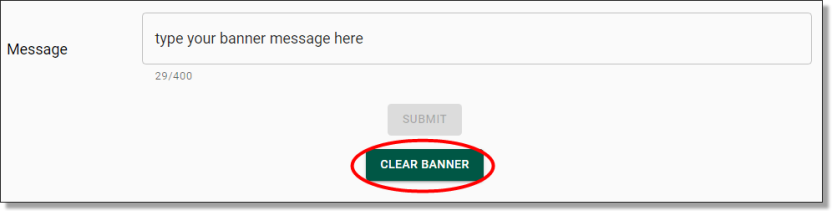
Fig. 5. CLEAR BANNER button
You will be asked to confirm this action, select ‘Yes’ to proceed. Once the action initiation is shown as successful, the banner message will immediately be removed from all internal interfaces within your SEADpod.
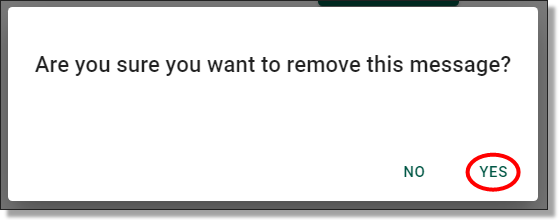
Fig. 6. Clear banner confirmation
Create Administrator
The administrators tab shows a list of current administrators for the SEADpod as well as their current administrator roles.

Fig.1. Navigating administrators tab
As a pod owner, you can create new administrators in SEAD. Start by clicking on the ‘NEW ADMINISTRATOR’ button presented at the top of the Administrators page.
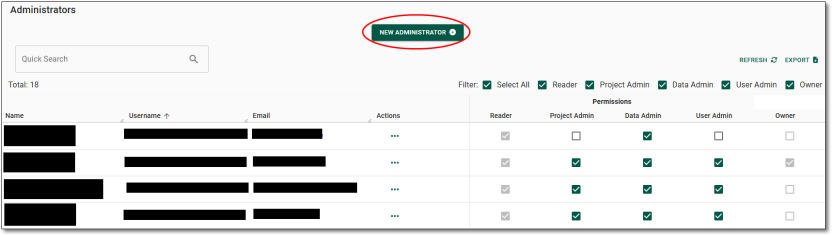
Fig. 2. 'NEW ADMINSITRATORS' button
You will be redirected to the Administrator registration form. All fields are required to be populated. You will also be able to select the user admin roles. NOTE: If the user email address already exists in the system, you will be unable to create them as an administrator.
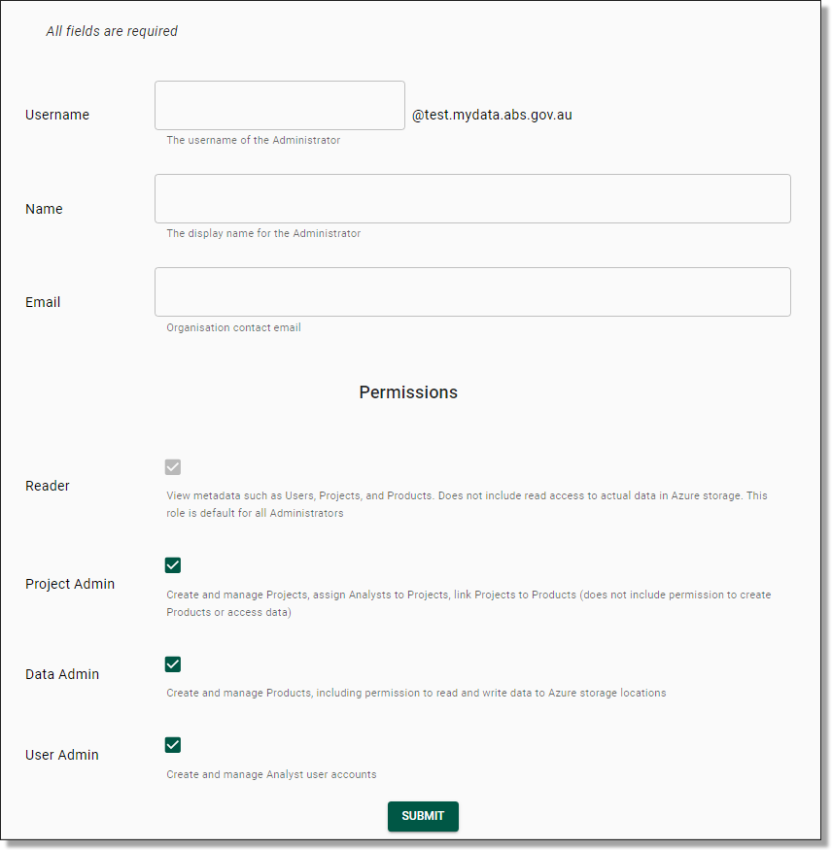
Fig. 3. New administrator form
Once you have pressed ‘Submit’, you will be asked to confirm that you wish to create a new administrator. If creating a new administrator is your intention, proceed by clicking ‘Yes’.
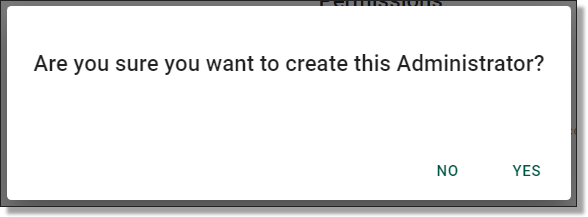
Fig. 4. New administrator confirmation
After confirming that you are intending to create a new administrator, you will be met with a pop-up notification advising that the admin creation is in progress and the administrators login details will be emailed to them via automated system notification. The administrator will shortly receive an email which contains their SEAD username and a temporary single use password that they will need to change on their initial login.
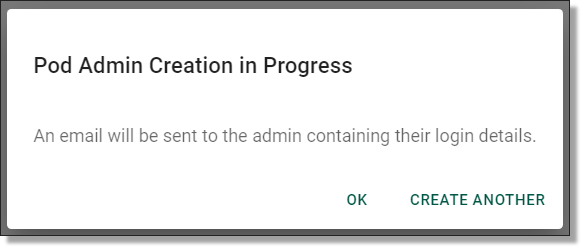
Fig. 5. New admin creation in progress pop-up
Delete administrator
As a pod owner you can delete an administrator. This will remove their access to the SEAD environment and the user interface. Administrators can be recreated at any time. To delete an administrator account, navigate to the Administrators page by selecting the ‘Administrators’ tab from the side navigation panel. If the administrator is not immediately available, type their name into the search bar. Once you have located the administrator, select the Actions menu and select 'Delete'.
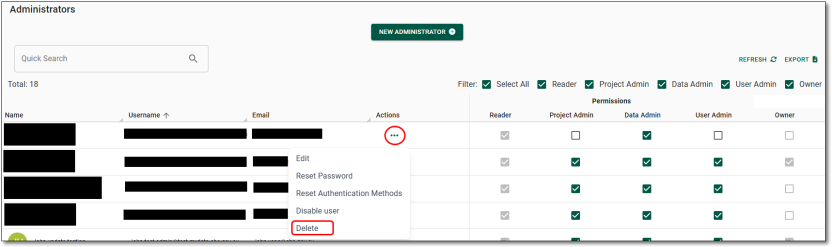
Fig. 1. Delete administrator account button
You will then be met with a pop-up asking if you wish to confirm deleting the administrator
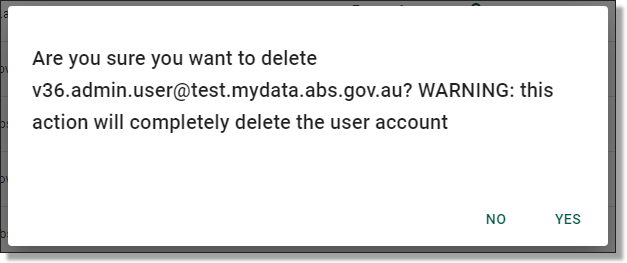
Fig. 2. Delete administrator account confirmation
Selecting 'Yes' will provide a confirmation that the administrator has been deleted.
Edit administrator
The details of an existing administrator can be edited. To edit these details, navigate to the Administrators page by selecting the ‘Administrators’ tab from the side navigation panel. If the user is not immediately available, type their name into the search bar. Once you have located the administrator account, select the Actions menu and select 'Edit'.
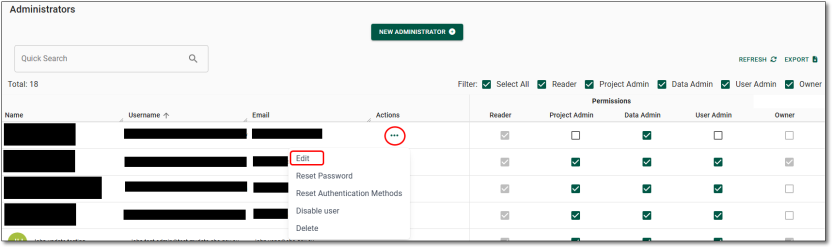
Fig. 1. Edit administrator account button
Clicking on the Edit button will redirect you to the Update Administrator page. All fields can be modified with the exception of the username. Make your updates, then click ‘Submit’.
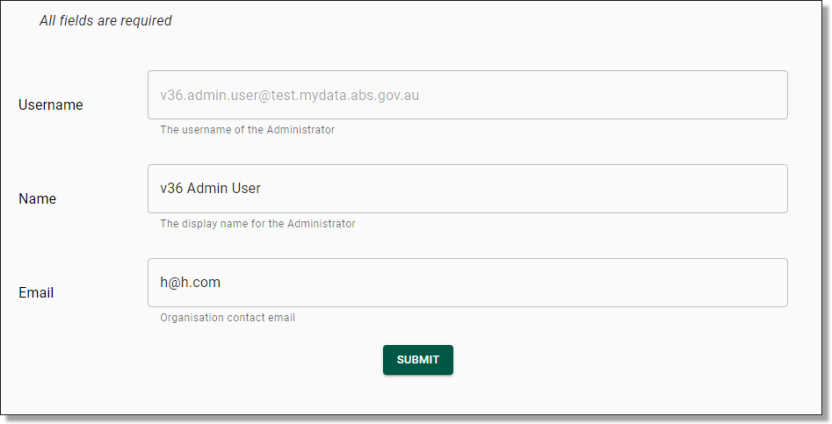
Fig. 2. Edit administrator account form
Once you’ve pressed ‘Submit’, you will be asked to confirm that you wish to update the administrator. If this is your intention, proceed by clicking ‘Yes’.
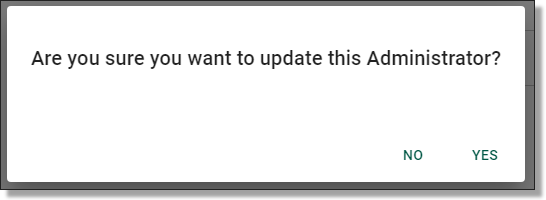
Fig. 3. Edit administrator confirmation
Reset administrator password
Pod Owners can reset passwords for SEAD administrators. Start by navigating to the administrators tab from the side navigation panel. If the user is not immediately available, type their name into the search bar. Once you have located the administrator account, select the Actions menu and select 'Reset password'.
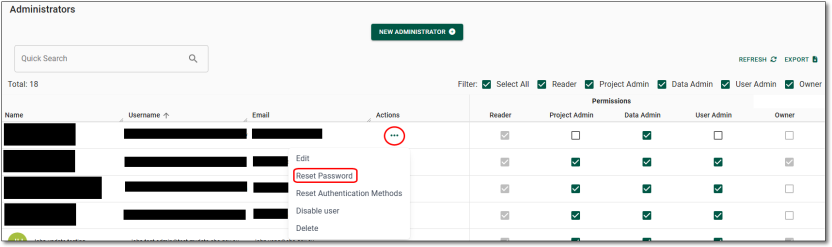
Fig. 1. Reset administrator password button
Clicking on ‘Reset Password’ will prompt a confirmation window, click ‘Yes’ to proceed.
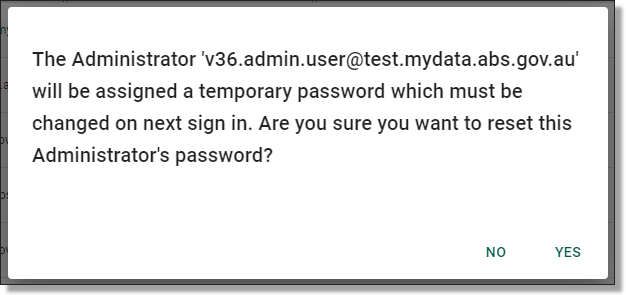
Fig. 2. Reset administrator password confirmation
You will then be met with a pop-up advising the password has been reset. An automated email will be sent the administrator's email containing a temporary password which will need to be changed the next time they sign in.
NOTE: The temporary password is valid for 90 days

Fig. 3. Administrator password has been reset notification
Reset administrator MFA
Pod Owners can reset the multi-factor authentication (MFA) for SEAD administrators. Start by navigating to the administrators tab from the side navigation panel. If the user is not immediately available, type their name into the search bar. Once you have located the administrator account, select the Actions menu and select 'Reset Authentication Methods'.
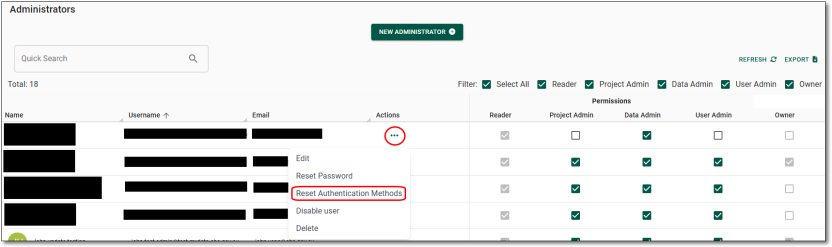
Fig. 1. Reset administrator MFA button
Clicking on ‘Reset authentication methods will prompt a confirmation window, click ‘Yes’ to proceed.
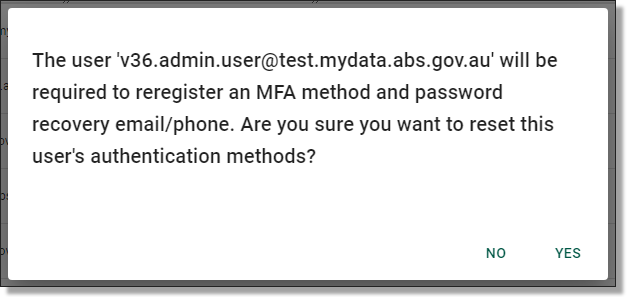
Fig. 2. Reset administrator MFA confirmation
The Pod Owner will not be required to forward on any additional information to the administrator once the MFA has been reset. It is up to the administrator to then go through the steps for setting up their MFA on their next log in.
Enable administrator
Administrator accounts, including other Pod owner accounts that have been disabled by a Pod owner, or automatically disabled following 45 days of inactivity, will need to be enabled by a Pod owner.
To enable a disabled account, navigate to the Administrators page by selecting the ‘Administrators’ tab from the side navigation panel. Once you have located the administrator account, select the Actions menu and select ‘Enable user’.

Fig. 1. Enable administrator account button
Once you’ve clicked on ‘Enable user’, you will be asked to confirm that you wish to enable the administrator. If enabling the administrator is your intention, proceed by clicking ‘Yes’.
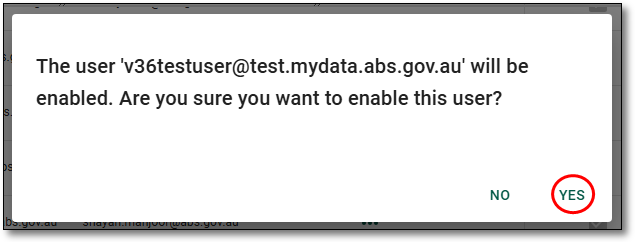
Fig. 2. Enable administrator account confirmation
You will be presented with a notification banner on the top right of the screen advising if the task was completed successfully. This can also be viewed from the Action Log.
Disable administrator
As a Pod owner, you can disable administrators accounts. This removes their access to the SEAD environment and the administrator’s interface, while retaining the account information. Disabled accounts can be enabled later when needed. Your administrator list should be curated regularly to ensure roles are relevant and accurate.
To disable an administrator’s account, navigate to the Administrators page by selecting the ‘Administrators’ tab from the side navigation panel. Once you have located the relevant administrator, select the Actions menu and select ‘Disable user’.
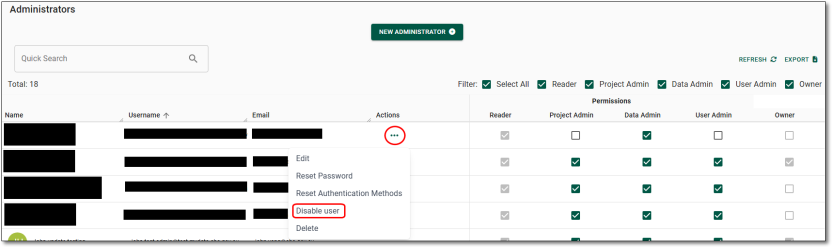
Fig. 1. Disable administrator account button
Once you have clicked ‘Disable user’, you will be asked to confirm that you wish to disable the administrator. If disabling the administrator is your intention, proceed by clicking ‘Yes’.
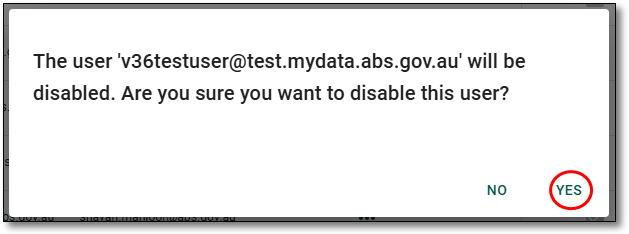
Fig. 2. Disable administrator account confirmation
You will be presented with a notification banner on the top right of your screen advising if the task was completed successfully. This can also be viewed from the Action Log.