Clearance requests
Create, submit and track clearance requests
Get started
Log in to myDATA and select the Clearance request tile from the dashboard.
You can track progress using the status:
- Draft
- Pending
- In progress
- Closed
Information on rules and requirements is available on the DataLab clearance webpage.
What you can do
Create requests for:
- Input
- Output
- Transfer
- Clearance enquiry
Create a request
- Select the Clearance request tile
- Choose the request type (Input, Output or Transfer)
- Select your project
- Select Next to load the form
Image

Description
Image shows a horizontal menu bar with four buttons: Create Input Request, Create Output Request, Create Transfer Request, and Enquiry.
Project selection
Use the search tool to find your project, select the project by ticking the checkbox, then click Select.
This links your request to the correct project. Your request will be visible to all active researchers on the project.
Image
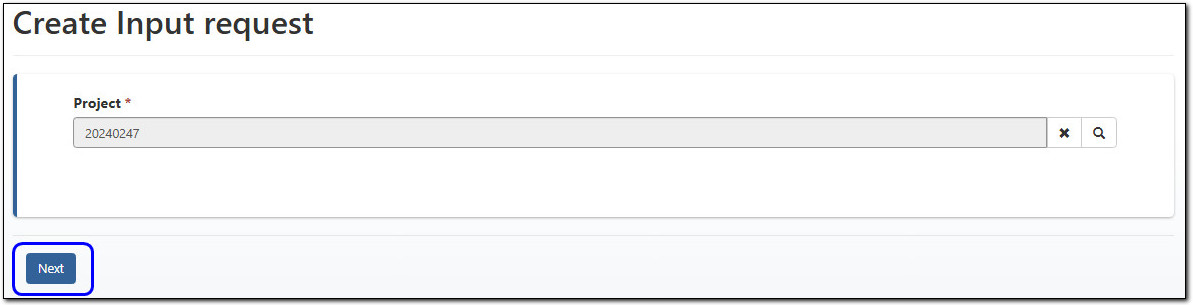
Description
Image shows a page titled, "Create Input request". Beneath the header is a grey search bar labelled, "Project", which in the image contains the text, "20240247". The right hand side of the search bar contains a cross symbol and a magnifying glass symbol.
At the bottom left of the page is a button labelled, "Next" (highlighted in image).
Virtual Machine (VM) name
You will need your VM name when submitting a request.
Find it in DataLab under My Projects in the left sidebar. The VM name is listed under machine details.
Image
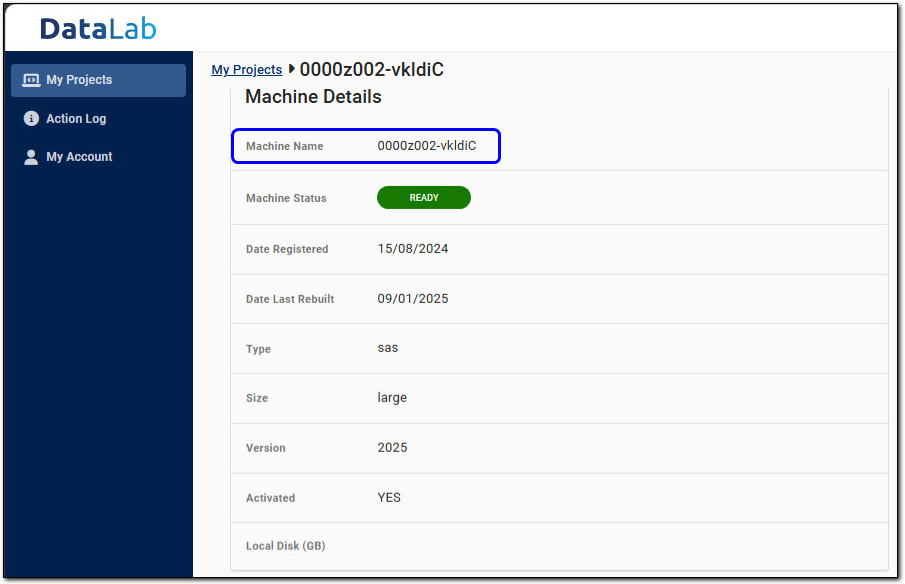
Description
Image shows a page in DataLab titled, "Machine Details". The breadcrumb navigation at the top of the page shows: "My Projects > 0000z002-vkldiC".
A vertical navigation panel on the left hand side contains three options: My Projects (currently selected), Action Log, and My Account.
Beneath the title of the page is a table without headers, containing the following details about the currently selected machine:
- Machine name
- Machine status
- Date registered
- Date last rebuilt
- Type
- Size
- Version
- Activated
- Local disk (GB)
In the image, the row containing the machine name is highlighted.
Request types
Input request
- Select Create Input Request
- Complete the form
- Attach required files
- Submit the request
Output request
- Select Create Output Request
- Complete the form
- Submit the request
Transfer request
- Select Create Transfer Request
- Complete the form and describe the files
- Submit the request
Manage your requests
Withdraw requests
You can withdraw a request while it is in Draft or Pending status.
Use the action menu on the request row.
Image
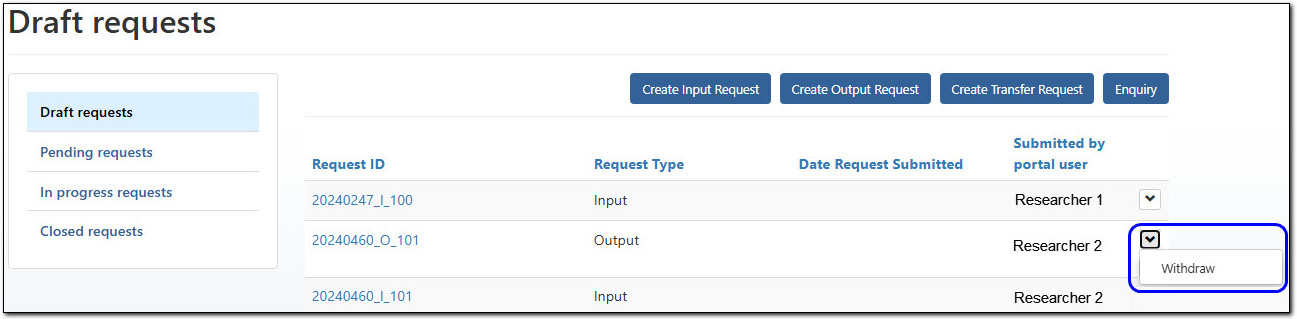
Description
Image shows a page titled, "Draff requests".
A vertical navigation panel on the left side contains four options: Draft requests (currently selected), Pending requests, In progress requests, and Closed requests.
The main section of the page is a table with the columns: Request ID, Request Type, Date Request Submitted, and Submitted by portal user. To the right of each record in the table is a drop down button. In the image, the drop down button for the second record in the table has been selected, showing a drop down menu with the option: Withdraw (highlighted in image).
Above the table are four buttons: Create Input Request, Create Output Request, Create Transfer Request, and Enquiry.
Enquiry
The Enquiry button will create an email message to the Clearance team.
Do not send any uncleared data in your enquiry.