myDATA
My Data Approvals To Access, application and management for safe data access
About myDATA
The myDATA user portal is the application and management interface for administrating safe data access to analysis platforms like DataLab.
myDATA provides the functionality for organisations and researchers to:
- register to their organisation, with an Responsible Officer Undertaking (ROU) in place
- onboard researchers
- create and maintain projects, and
- request new data linkages.
Who can access the DataLab outlines requirements for organisations and researcher in further detail.
Within myDATA you can undertake the following:
- enrol and manage your training session attendance
- create a project (which you are Project lead/editor for)
- track status changes through the Overview of a project
- submit change requests
- submit and track data clearance requests
- close projects.
Charges
There are associated charges for microdata access via the DataLab.
How to access myDATA
- Register using your organisational email address
- Complete all authentication steps
- Log into myDATA
Refer to Getting started for full instructions.
If you are affiliated with multiple organisations, you will need to register separate accounts for each organisation.
myDATA conditions of use
The following conditions are applicable to all users registered in My Data Approvals to Access (myDATA) for access to DataLab projects.
By registering in myDATA, I agree:
- To provide true and correct information about my identity and contact details when registering, and if these details change, to provide the updated details to the ABS. I understand if I leave my organisation new approvals need to be sought for continued access to data or systems.
- The ABS may discuss my registration and access with my organisation's Contact Officer and Project lead, who have the authority to remove my access.
- To keep my log in credentials for ABS systems secure and not share my log in credentials with any other person or organisation.
- ABS can share my project information, such as contact details, project name, project lead and organisation and dataset access with other organisations and users. This information will only be shared at the discretion of the ABS for the purposes of administering access to data, such as seeking approvals on your behalf with the data custodians responsible for the data, system logging and disclosing user details to other users for the purpose of enabling collaboration.
- ABS can share with other organisations confidentialised information about my organisation's system and data usage, for the purposes of usage reporting, auditing, feedback or performance. Any personal information collected will be held while there is a business need and kept in accordance with the Privacy Act 1988. See also, ABS privacy policy and DataLab privacy notice.
- ABS may contact me to provide me with information about data, systems or products, such as upcoming releases, system changes or to seek my feedback.
- To comply with the ABS conditions of sale.
I acknowledge that:
- My use of myDATA and ABS systems may be audited.
- The ABS may partially or fully remove, suspend or deactivate my access to ABS systems, data, files or tables. This may be for ABS operational reasons, such as implementing changes to data or systems, or for a breach of ABS directions and system constraints.
- A breach of these conditions of use may result in sanctions which may include, but are not limited to, ABS removing access to these systems for me and/or my organisation permanently or for a set period of time.
- Removal of access does not entitle a user or organisation to a refund of any subscription charges and the ABS is not liable for any damages this removal of access may have for a user or organisation.
- While the ABS has taken great care to ensure that the information provided within ABS systems is as correct and accurate as possible, the ABS does not guarantee, or accept any legal liability arising from, or connected to, the use of any material contained within, or derived from these systems. See ABS disclaimer for further information.
Privacy policy
The ABS privacy policy and DataLab user privacy notice outline how the ABS handles any personal information that you provide to us.
The ABS Privacy Policy for Managing and Operating Our Business outlines how we handle personal information that is collected for managing and operating within the ABS.
Getting started
Registration steps and user portal features
Register, authenticate and login
Step 1
Follow the steps to register a new account in myDATA.
Step 2
After registering with your organisational email address, you will receive two emails:
- Welcome to myDATA, from ABS, and
- Activate your ABS account, from Okta.
Click the 'Activate ABS Account' button from the Okta email to complete the account activation process:
- this email may appear in your spam folder
- the activation email link is valid for 7 days
- for a new activation link contact mydataportal@abs.gov.au.
Note:
- personal email addresses cannot be used, use your organisation email address
- if your organisation is not registered with myDATA, contact mydataportal@abs.gov.au
- your myDATA account does not include access to data access systems. These are accessed separately.
Step 3
Create a password and set up the authenticator.

Image shows a pop-up box titled "Set up required". The user is provided with two options, each with its own "Set up" button:
- Google Authenticator, with the help text: "Enter a temporary code generated from the Google Authenticator app. Used for access."
- Password, with the help text: "Choose a password for your account. Used for access."
After setting up your password, you will be prompted to complete additional authentication.
Download the Google authenticator App on your mobile device.
The App Developer is Google LLC. This is a free App that does not have in App purchases. Credit card details are not required.

A screenshot of the Google Authenticator app in the App Store, providing the following information:
- It is owned by Google,
- It is #5 in Utilities (at time of screenshot),
- It has a rating of 4.8/5 from 102.7K reviews (at time of screenshot),
- It is free.
Step 4
Set up Google Authenticator (this step must be actioned from your computer).
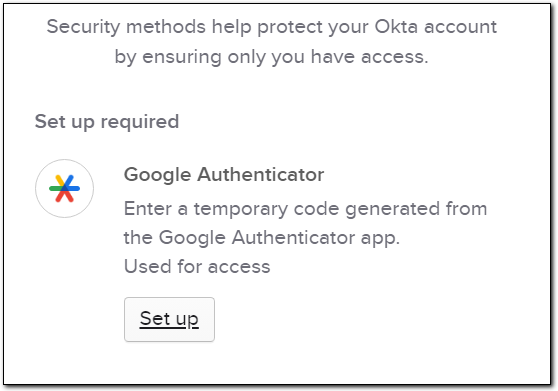
Image shows a pop-up box with the heading, "Security methods help protect your Okta account by ensuring only you have access. Set up required."
The user is provided with a "Set up" button for Google Authenticator, with the help text, "Enter a temporary code generated from the Google Authenticator app. Used for access."
Follow the prompts using your Google Authenticator App on your mobile device, tap the + icon and then select scan barcode.
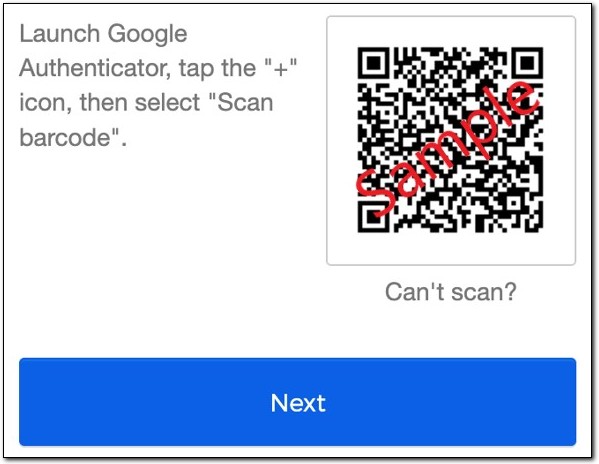
Image shows a pop-up box with a QR code in the top right corner, labelled as "Sample". The help text reads, "Launch Google Authenticator, tap the "+" icon, then select "Scan barcode"."
A button labelled "Next", runs along the bottom of the pop-up.
After scanning the barcode generated by your computer, enter the code and verify from Google Authenticator App.
Follow the on-screen prompts.
Step 5
When your account has been verified, you will see 'Your account is almost ready!'

Image shows a webpage with the header, "Your account is almost ready!"
The text beneath reads, "We are setting up your account. Please refresh the browser in a few minutes. If it takes longer than 15 minutes, contact data.services@abs.gov.au."
At this stage the system is building your profile and access. This takes a minute or two. Refresh the browser by either selecting the myDATA logo or refresh function button (F5).
Once the page has refreshed you will be prompted to confirm your details. Click the ‘Submit’ button at the bottom of the page, and then you should be able to see the main myDATA dashboard.
Portal features
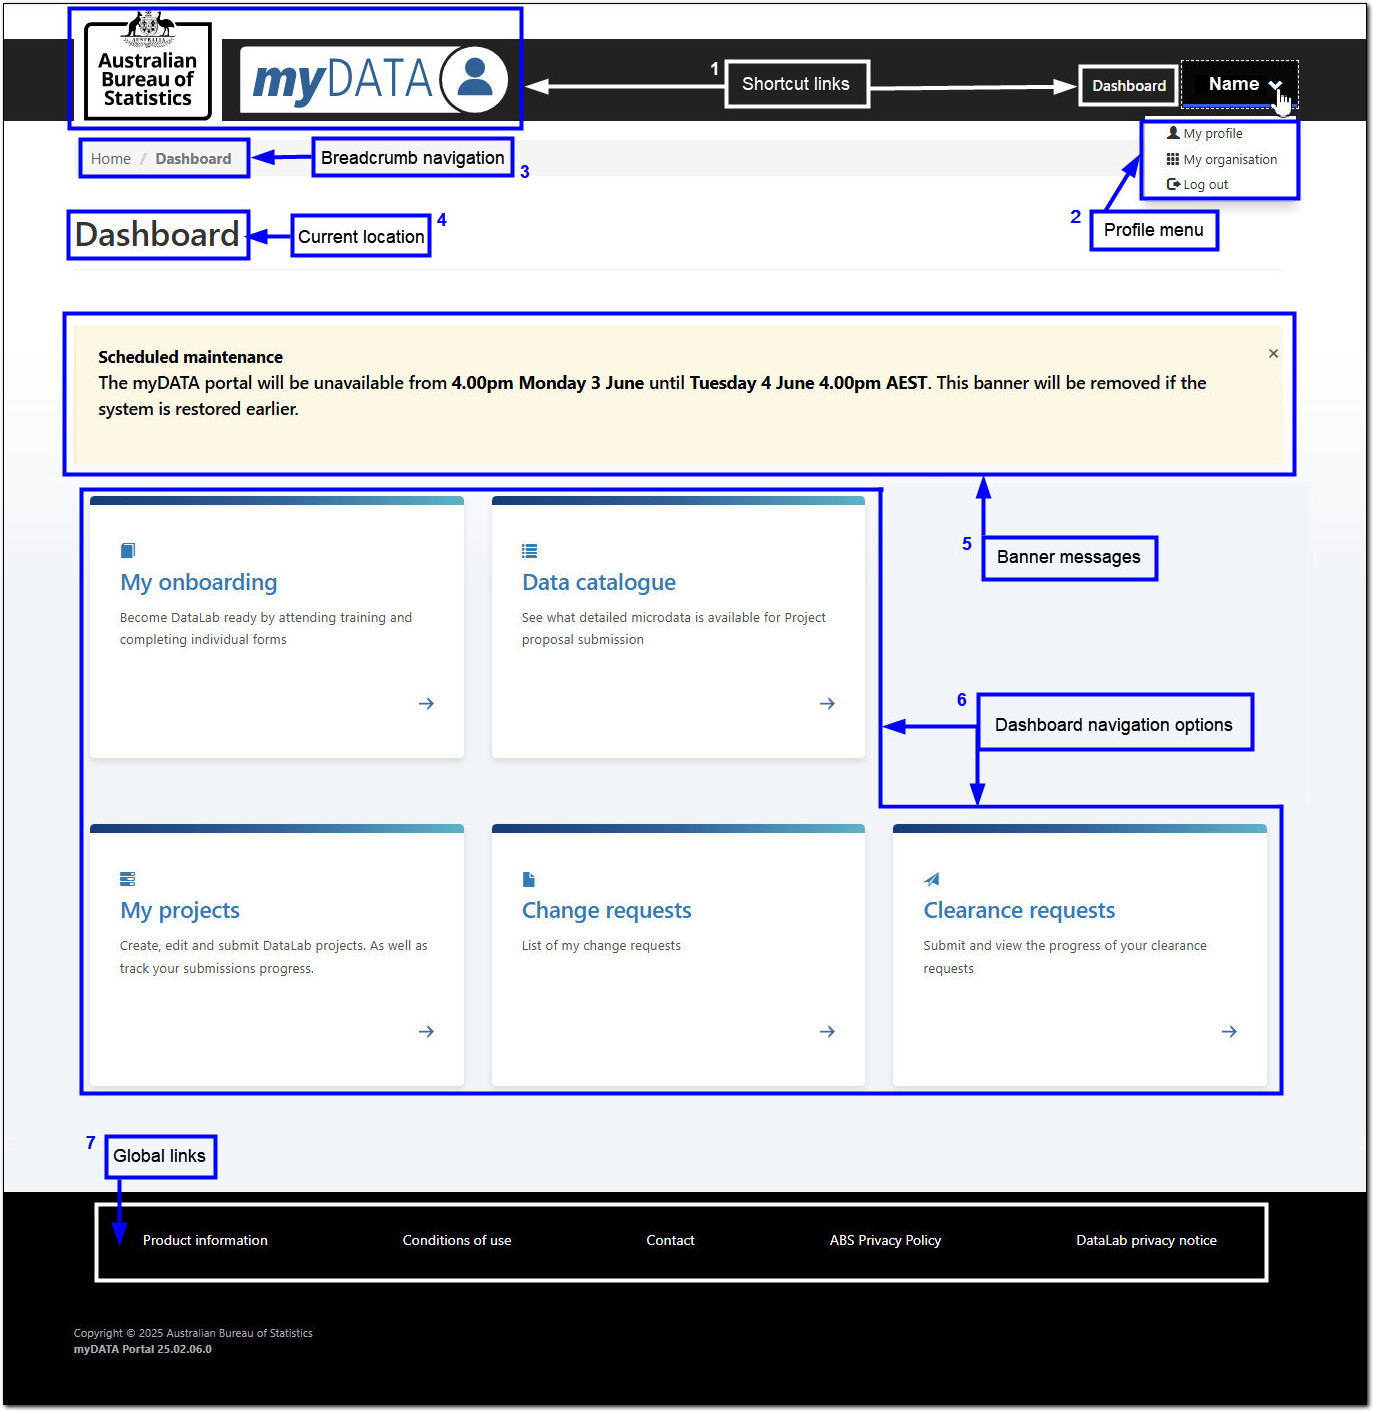
Image shows a screenshot of the myDATA user portal dashboard, annotated to show the different features.
- Shortcut links: located in the top banner, navigate to the ABS and myDATA home pages or the main myDATA dashboard.
- Clicking on your name in the top right corner will display:
- My Account: displays your registered information. You can update most fields. If you need to change your email you will need to contact mydataportal@abs.gov.au
- My organisation: displays your organisation. If you are affiliated with multiple organisations you will need an account for each organisation
- Log out: It is best practice to log out of your active session. If you are inactive for more than 30 minutes you will be automatically logged out
- Breadcrumb navigation: displays navigation pathway. You can click on pages in the breadcrumb.
- Current location: displays the current active page.
- Banner messages: highlights important information such as scheduled outages.
- Dashboard tiles: these tiles are shortcuts to various myDATA features.
- Global links: takes you to important ABS webpages.
Workflow status
Highlight where access is up to
The information below outlines the status movements of researchers and projects as they move through their respective workflows.
Project researcher
As a researcher, your training record is reflected by the DataLab Status (onboarding) on a project, these are described below:
- Training required: mandatory training has not been completed
- Enrolled: successfully enrolled into a training session
- Forms pending: attended training and not submitted post training quiz and forms
- Onboarding complete: completed DataLab onboarding.
Project statuses
The project proposal brings together scope, data and people (researchers) into one application. Each of these entities require approval. These approval processes are dependant on their own workflow, and can move through at different rates.
After the Project is approved, People (researchers) and Data can incrementally become active as approvals and/or DataLab Status (onboarding) processes are completed.
Project proposal
- Draft: Project editor is drafting the proposal
- Submitted: ABS has been sent your proposal and may supply feedback. Feedback will reset the proposal back to Draft
- Under assessment: ABS are assessing the proposal against the 5 safes framework
- Pending approval: the proposal is with approvers
Approved: the project has been approved
Note: for new projects, approval from one Data Custodian is required, and one Project researcher with the status of onboarding complete, before the project will be created.
- Active: access is now available in DataLab. At minimum this will consist of one data package and one project researcher with the status of Onboarding complete
- Withdrawn: Project submission is not moving forward
- Closed: Project has closed, access is no longer available
Project data package
Datasets contain multiple data packages. Each data package that the project requires must be approved by the relevant Data Custodian/s before access:
- Draft: added to a project proposal
- Submitted: ABS has the project proposal and may supply feedback
- Under assessment: ABS are assessing against the 5 safes framework to support the request
- Pending approval: data request is with Data Custodian/s
- Approved: Data Custodian/s have approved access
- Active: data has been loaded and ready for analysis
- Withdrawn: access is not moving forward
- Declined: data requested has not been approved and will not be added to the project.
Project researcher
- Joined: added to a draft project or in an 'Organisation and People' change request
- Submitted: ABS has received the project proposal
- Under assessment: ABS are assessing against the 5 safes framework to support the approval request
- Pending approval: the request to add researcher/s is with the ABS General Manager
- Approved: ABS General Manager has approved access
- Active: access is now available in DataLab (for analysts only)
- Withdrawn: access is not moving forward
- Removed: researcher no longer has access to the project
Change requests statuses
Changes to an Active project are made by submitting a Change request. There are two types and each follows the workflows described above:
- Project details - Scope, data, outputs: this change request follows the Project data package statuses
- Organisation and People: this change request follows the Project researcher statuses.
Data Linkage Request statuses
Data Linkage Requests (DLR) can be submitted at any stage in the project workflow. They progress independently from the project:
- Draft: project editor has created and is drafting the DLR
- Submitted: ABS has received the DLR for review
- Stage 1/4: DLR build pipeline stage
- Stage 2/4: DLR build pipeline stage
- Stage 3/4: DLR build pipeline stage
- Stage 4/4: DLR build pipeline stage
- Approved: the DLR is completed and will be added manually to the Active project
- Declined: the DLR is not proceeding.
Clearance request statuses
Input, Output and Transfer requests all share the same status flows:
- Draft: active project researcher has created a clearance request
- Submitted: the request has been sent to ABS for review
- In progress: the ABS clearance team is reviewing your request
- Additional information required: information needs to be supplied for your request to progress
- Released: the request has been cleared and sent back to the project researcher and selected recipients
- Declined: the request will not proceed.
Enquires are treated as emails and do not follow the workflows described above.
My onboarding
Managing safe people
If you believe you have previously completed DataLab training, contact Data Services and the team will look into your training history.
Enrol in training
Click on the ‘My onboarding’ tile and select the ‘Enrol in training’ button.
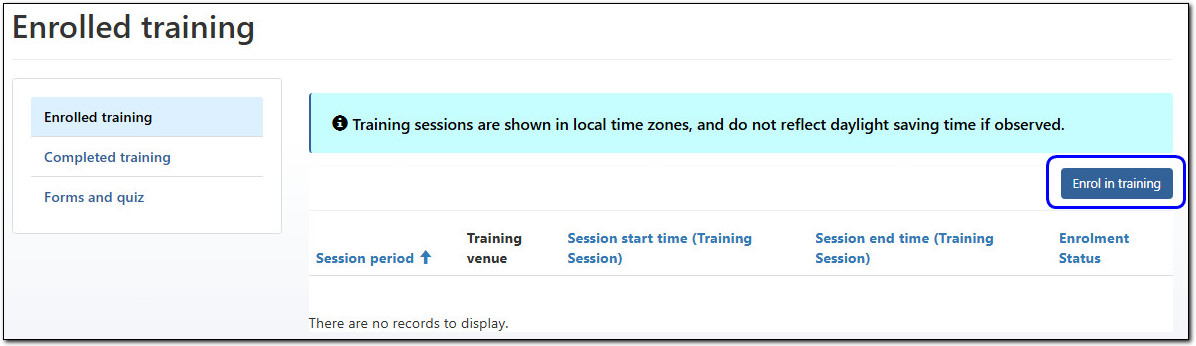
Image shows the enrolled training view, with the page header "Enrolled training". A vertical navigation menu on the left hand side offers the following three options: Enrolled training (currently selected), Completed training, and Forms and quiz.
The main section of the page is a table with the columns: Session period, Training venue, Session date, and Enrolment Status. The table in this screenshot has no records to display.
The help banner above the table reads, "Training sessions are shown in local time zones, and do not reflect daylight saving time if observed." To the right of the help text above the table is a button labelled, "Enrol in training", which has been highlighted in the screenshot.
Select the magnifying glass to bring up the list of available sessions, and choose your preferred session by ticking the box on the left.
Confirm your action by clicking Select.

Image shows a pop-up box with the header "Lookup records". The pop-up contains a table with the following columns: Training Course, Session Date, Sessions start time, Session end time, and Training Venue. Each record in the table has a tick box to the right of it. The help text above the table reads "Choose one record and click Select to continue."
Beneath the table are four buttons, labelled as follows: No session suitable, Select, Cancel, Remove value.
In the screenshot, the tick box or the first record and the Select button have both been highlighted.
Session details are displayed. Click ‘Submit’ and then ‘Ok’ to confirm.
The ‘Enrolled training’ table will now be updated with your session date and time.
You will receive an email with the training session details, including a meeting link for a virtual session, and physical training address for face-to-face.
Pre-reading
After enrolling in a DataLab Safe Researcher training session, you will automatically have access to the pre-training reading material.
This is available from the ‘Forms and quiz’ view of the ‘My onboarding’ table.
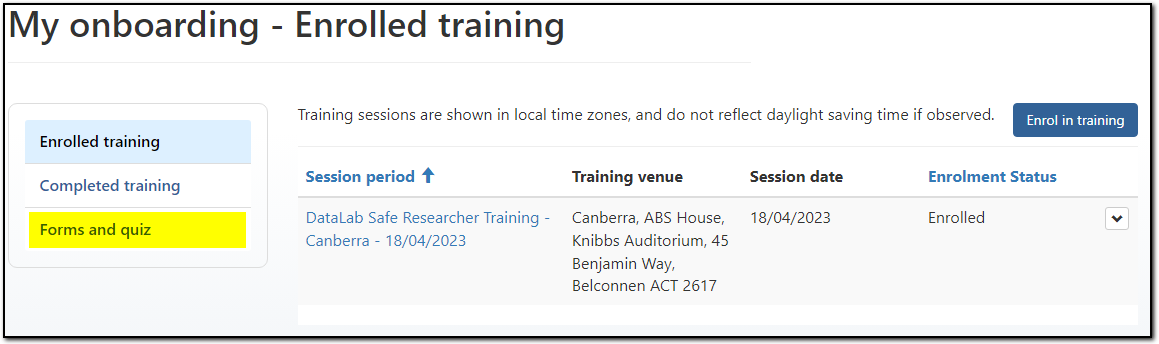
Image shows the enrolled training view, with the page header "Enrolled training". A vertical navigation menu on the left hand side offers the following three options: Enrolled training (currently selected), Completed training, and Forms and quiz (highlighted in the screenshot).
The main section of the page is a table with the columns: Session period, Training venue, Session date, and Enrolment Status. The table in this screenshot has one record, with the Enrolment Status, "Enrolled".
To download a document in the Forms and quiz section, click the arrow to the right of the row, and select ‘View’.
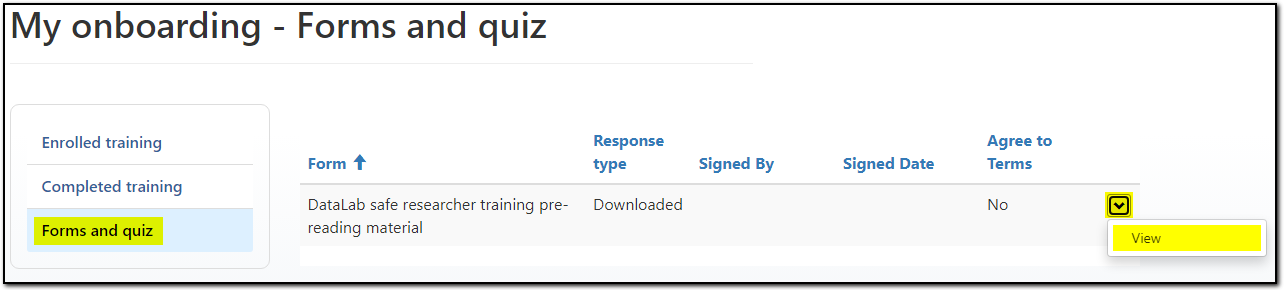
Image shows a page with the header, "My onboarding - Forms and quiz". A vertical navigation menu on the left hand side offers the following three options: Enrolled training, Completed training, and Forms and quiz (currently selected).
The main section of the page is a table with the columns: Form, Response type, Signed By, Signed Date, and Agree to Terms. The table in this screenshot has one record.
To the right of the record in the table is a drop down arrow. In the screenshot, the arrow has been clicked, showing a drop down menu with the option, "View".
Select the file and save it to your computer.
Completing training forms and quiz
Onboarding forms will be available upon completion of training.
You will be notified by email when your onboarding forms and quiz are available to download. You will find these in the same place as the pre-training reading material - the 'Forms and quiz' view of the ‘My onboarding’ table.
Completed forms and quiz are to be returned to mydataportal@abs.gov.au.
You will be notified when your onboarding is complete.
No sessions suitable
If the training sessions listed are not suitable, you can elect to be placed on a waitlist. Click ‘No session suitable’ button.

Image shows a pop-up box titled, "Lookup records". The box contains a table with the following columns: Training course, Session Date, Session start time, Session end time, and Training Venue. To the left of each record in the table is a tick box.
The help text above the table reads, "Choose one record and click Select to continue."
Beneath the table are four buttons, labelled: No session suitable (highlighted in the screenshot), Select, Cancel, and Remove value.
You will see the above message. ABS will contact you within two business days. If no response is received, please email mydataportal@abs.gov.au.
Cancelling or rescheduling a session
If you need to reschedule your training session, you will need to cancel your current enrolment. Select the drop-down arrow to the right of the table row and click ‘Cancel’ and then ‘Confirm’.
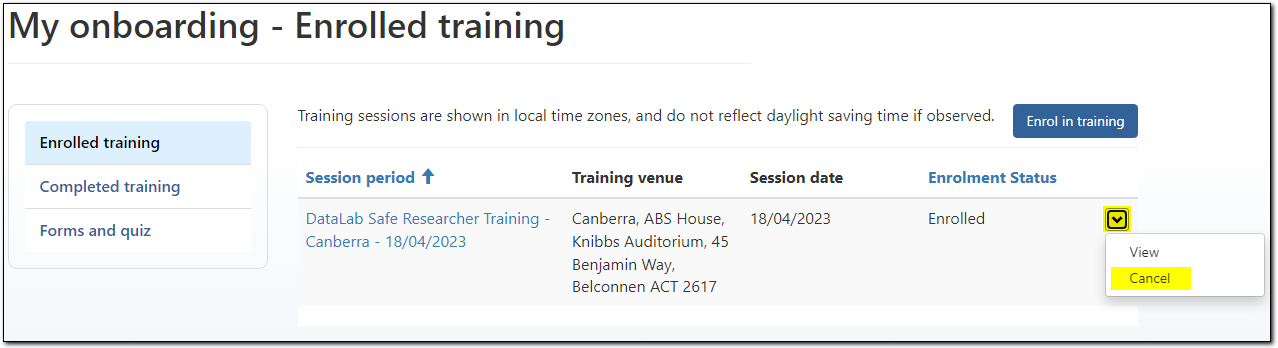
Image shows a page with the header, "My onboarding - Enrolled training". A vertical navigation menu on the left hand side offers the following three options: Enrolled training (currently selected), Completed training, and Forms and quiz.
The main section of the page is a table with the columns: Session period, Training venue, Session date, and Enrolment Status. The table in this screenshot has one record.
To the right of the record in the table is a drop down arrow. In the screenshot, the arrow has been clicked, showing a drop down menu with the options: View, and Cancel (highlighted in the screenshot).
Once you have cancelled a session, you can then enrol in another session.
Further information on DataLab onboarding
Safe researcher training outlines:
- what is safe researcher training
- refresher training, and
- safe researcher training resources.
Data catalogue
Identify and add data to a project
Data catalogue
The Data Catalogue will help you understand what is available before research starts.
Filter by Dataset, or Search the Data packages, to help refine your search.
If further Product information is available (like the data item list) a link will be provided.
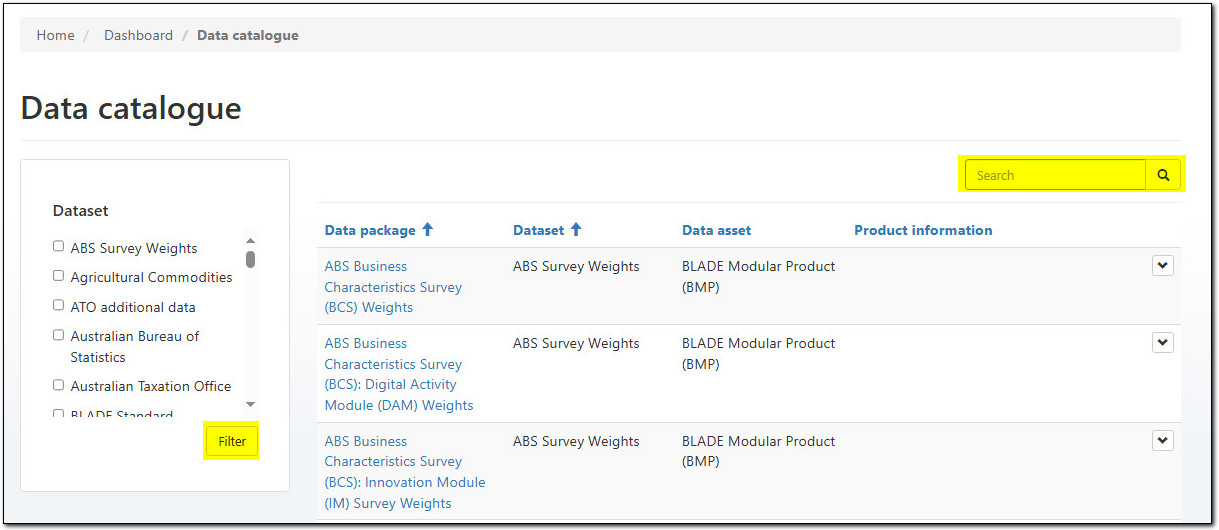
Image shows a page titled, "Data catalogue", containing a table with the columns: Data package, Dataset, Data asset, and Product information. To the right of each record in the table is a clickable drop down arrow.
A filter menu on the left hand side allows a user to select certain datasets and then click the Filter button (highlighted in the screenshot) to filter the table according to their selection.
Above the table is a search bar (highlighted in the screenshot).
When it is known what data packages will be required, take note of the
- Data asset, and
- Dataset categories
These categories will be needed when adding data to the project proposal.
Project proposal data selection
From the Data tab of the project proposal, select the 'Add' button.
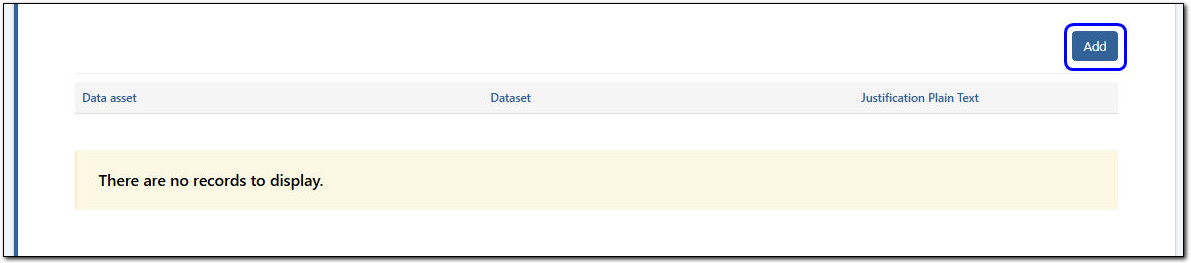
Image shows a table with the columns: Data asset, Dataset, and Justification Plain Text. The table contains a banner with the text, "There are no records to display."
Above the table is a button labelled "Add" (highlighted in the image).
Select the Data asset category, by clicking the magnifying glass. Select one of the data assets, and then repeat for the Dataset category.
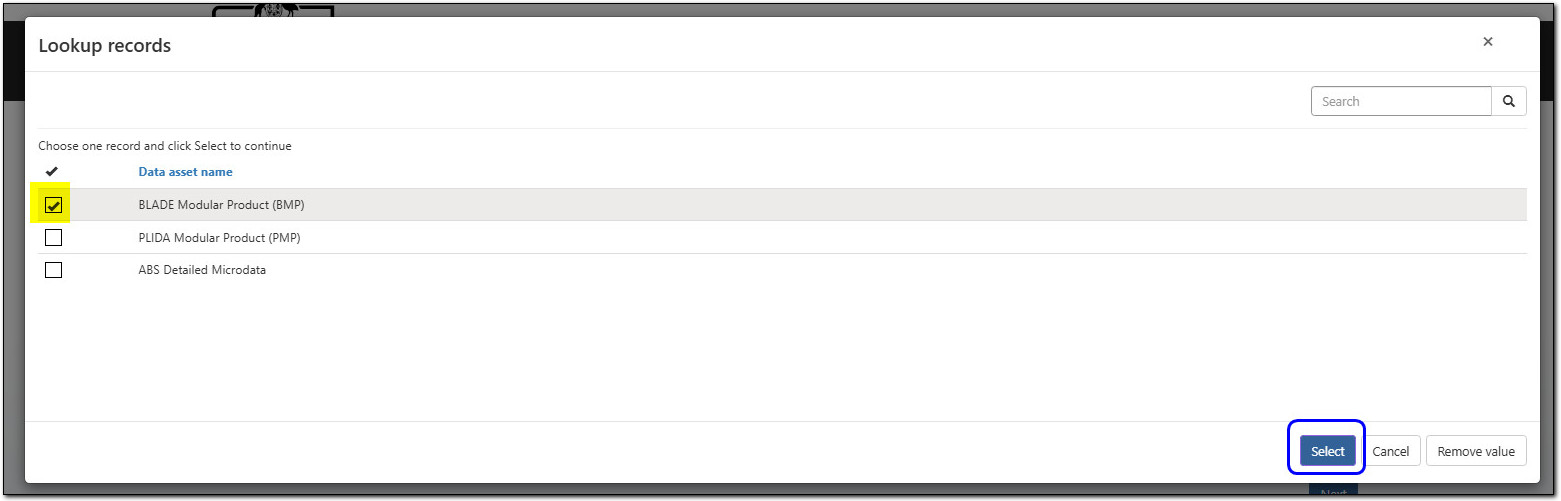
Image shows a pop-up box titled, "Lookup records". The pop-up contains a table with the column: Data asset name. To the left of each record in the table is a tick box (the tick box for the first record in the table has been highlighted in the image).
The help text above the table reads, "Choose one record and click Select to continue."
Beneath the table is three buttons: Select (highlighted in the image), Cancel, and Remove value.
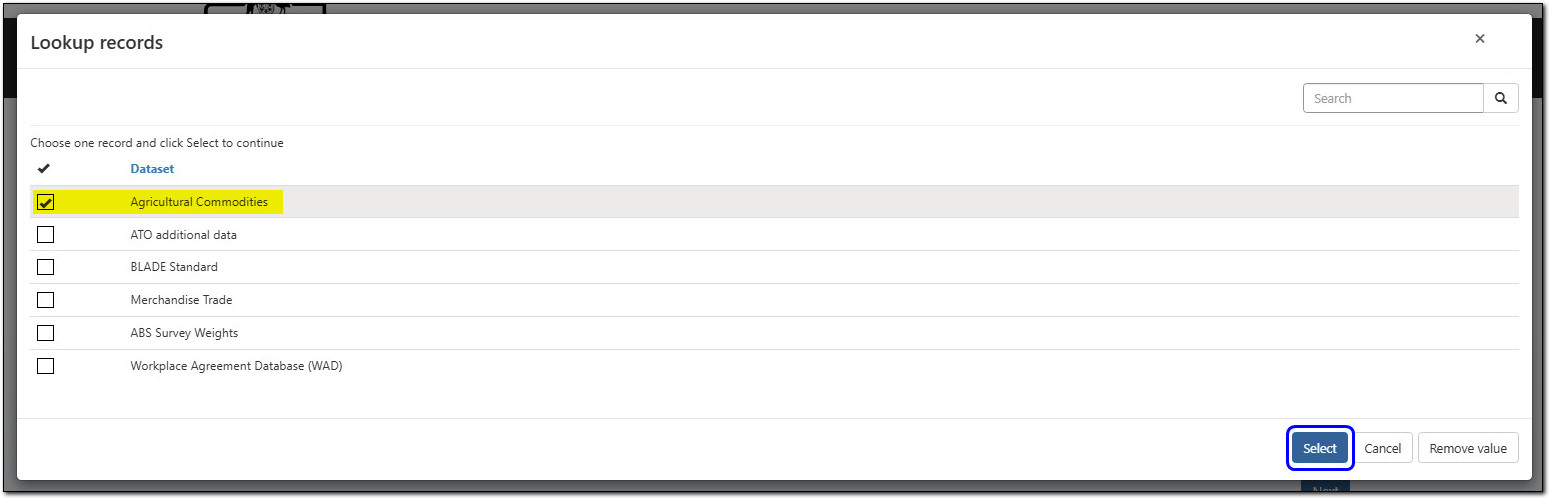
Now you have filtered to the Data asset and Dataset, the description shows what Data packages are available within this category.
If this suits your research select the Next button, from the bottom right location.
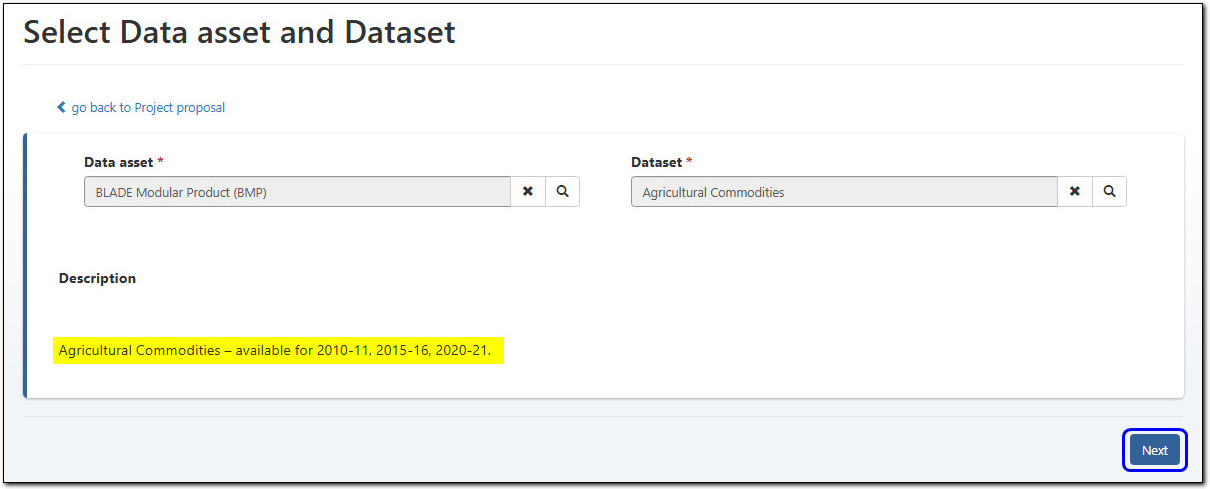
Image shows a page titled, "Select Data asset and Dataset".
Two greyed-out search bars are positioned next to each other, each with a red asterisk denoting a required field. The bar on the left is labelled, "Data asset" and in the image contains the text, "BLADE Modular Product (BMP)". The bar on the right is labelled, "Dataset" and in the image contains the text, "Agricultural Commodities".
Beneath the search bars is an non-editable text field with the title, "Description", containing the description for the dataset selected above (highlighted in the image).
In the bottom right corner of the page is a button labelled, "Next" (highlighted in the image).
Within the project proposal, when selecting a Data package you may be asked for justification. If required, the justification text displays in bold text below the Dataset description.
You can select one, many or all Data packages by ticking the corresponding box.
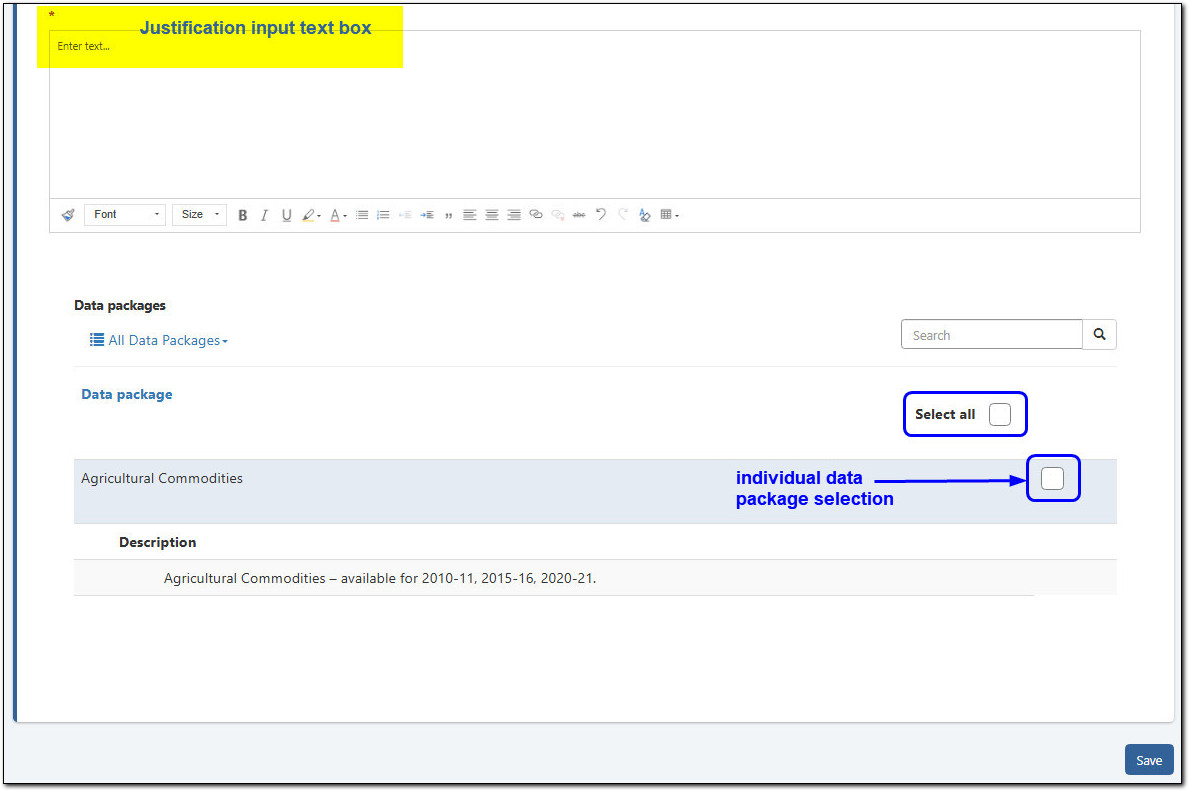
At the top of the image is an open text field with a red asterisk denoting a required field. In the image, the text field has been highlighted and labelled "Justification input text box".
The section beneath the text field is titled "Data packages", and contains a hierarchical list of the data packages belonging to each of the selected datasets. To the right of each data package in the list is a tick box (highlighted in the image and labelled "individual data package selection"). Above the table is a tick box labelled "Select all" (highlighted in the image).
In the bottom right of the page is a button labelled "Save".
Possible errors
When you have finished your data package selection, and provided a response to the justification, select Save.
If you have not selected one to many data packages you will receive an error message.

Image shows an error box with the text: "The form could not be submitted for the following reasons: You must select at least one data package."
If you have not entered the mandatory justification you will receive an error message.

Image shows an error box with the text: "The form could not be submitted for the following reasons: Justification is a required field. Please provide justification for selected data packages."
When all Save conditions are met you will be returned to the project proposal - where you can continue your proposal.
If no data packages meet your needs, you can exit the 'Select data package' form by choosing the 'go back to project proposal' breadcrumb link.
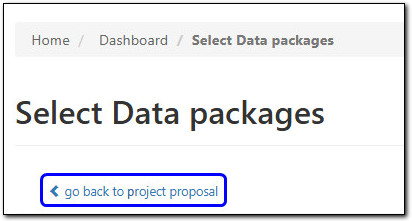
Image shows the top of a page titled, "Select Data packages". Beneath the header is a link with a back arrow and the display text, "go back to project proposal" (highlighted in the image).
Edit data selection
Either through a new project or a Change request (Scope, Data and Output) you may want to add or remove more data packages within the dataset.
Select 'View details' from the action menu shown on the Dataset row.

Image shows a table with the columns: Data asset, Dataset, and Justification Plain Text. The records in the table are hierarchical, showing the selected datasets and the selected data packages they contain. To the right of the dataset records is a drop down arrow, which has been clicked in the image to show a drop down menu with the options: View details (highlighted in the image), and Remove.
My projects
Create, edit, submit and track project proposals
Only Active researchers can view or discuss unvetted data from their active project.
Researchers listed as Removed or Pending are NOT permitted to view or discuss until they are listed as ACTIVE on the project proposal.
Creating and editing
Any portal user who meets the following criteria can create a Project proposal:
- has an Active myDATA account, and
- belongs to an organisation with an active Responsible Officer Undertaking.
The researcher creating the project proposal will automatically be set as the Project editor. The Project editor is the only person who can edit the project proposal. All researchers added to the project proposal will be able to read, but not edit.
The Project editor is usually the Project lead, however the role to draft, edit, submit and maintain the project proposal can be delegated to another researcher.
The role of Project editor can be changed when the project proposal is in Draft status. When the proposal is at Active status, a change request will need to be submitted to change the Project editor.
If the Project lead assigns responsibility to a Project editor, they are also agreeing this Project editor has the same responsibilities, delegations and authority on the project proposal.
Draft, Submit, Feedback
Project proposals start in a Draft status, and when all fields have been filled the project proposal can then be submitted to the ABS for review. At this point the project proposal shifts to a Submitted status and cannot be edited by the Project editor.
The ABS will review your content to ensure the project meets requirements. If more details or changes are necessary, feedback will be added to the Project proposal and an information box as per below will display at the top of each project proposal page.

Image shows a message box with the text: "There is feedback provided on this page. Click here to view."
All feedback needs to be reviewed and acknowledged, you can reply if necessary. Once reviewed, the information box will no longer appear at the top of the page.
The project proposal goes through several cycles of review (draft, submission, and feedback) until it meets ABS requirements and is ready for the approval stage.
Autosave
The proposal will auto save when the Project editor moves to the next page (Save & Next button) or after 5 minutes of inactivity.
If changes are made and the Previous button is selected - changes will not be saved!
When the autosave has run after inactivity an information box will display.

Image shows a message box with the text: "This page was autosaved on 6:51:37 pm."
Time out
If myDATA is inactive for 30 minutes or more, your session will time out and you will need to log in again.
Project proposal
The project proposal has several sections which all need to be completed in order:
- Access conditions: outlines important points to remember when preparing your proposal.
- Project details: sets the title, editor and start/end dates.
- Project objectives: sets the project aims, outcomes and research objectives, information, purpose of access, ethics, consultation, grants and system options.
- People: links to Organisations with active Responsible Officer Undertakings, and allows you to select the active portal users registered within myDATA.
- Data: links the available data packages to the project.
- Output: seeks your expected outputs and dissemination methods.
- Attachments: can only be added by ABS administration, and will reflect supporting documents supplied for this project application.
- Submit: runs checks across the project to ensure you have completed all fields.
Adding people
People can only be added from organisations with an active Responsible Officer Undertaking and after the person has successfully activated their myDATA profile.
From the People page of the project proposal add the organisation/s to the Stakeholders section. The organisation can be:
- Lead organisation: the organisation that is responsible for the project
- Member organisations: partnering on the project and may require access to data for analysis and discussion
- Government organisation sponsor: lists out the Government organisations, if the project is being sponsored, these organisations cannot discuss data until data has been cleared through an Output vetting request.
When the organisation/s have been added, you will be able to add Project researchers from the lead or member organisations.
After adding people to the Project researchers table, you can Edit or Remove Project researchers from each row action menu.
Adding data
From the Data Catalogue card on the Dashboard, you can gain an understanding of what data is available before starting a project proposal.
To add data to the project proposal you must navigate through the categories to show available data packages. The catalogue structure is
- Data asset: BLADE, PLIDA or ABS detailed
- Dataset: Owning organisation or ABS topic
- Data package: available groupings of data which the project will be granted access to when all approvals are provided.
When selecting a Data package you may be asked for justification. This is mandatory for access considerations.
When you save your selection, you can go back and add more data packages, or remove any which are no longer needed from each row action menu.
Detailed steps are outlined in the Data catalogue section of this user guide.
Data Linkage Request
To apply for a new Data Linkage, select the Add button from the Data Linkage Request (DLR) table on the project overview page.
Complete all the relevant details and submit.
When the project proposal is submitted, the ABS will review your data linkage request and follow up to seek additional information.
A DLR can be added to the project that is at any status. Progress can be monitored from the Project proposal overview, Data Linkage Requests table.
If changes are required for a Data Linkage Request linkage, please contact mydataportal@abs.gov.au.
Other data
If you require data not included in the data catalogue, including subsets of existing data and requests to load other unlinked data (including aggregate data), complete the section ‘Other data requirements’ with as much detail as possible.
Customised subsets of a PLIDA dataset should only be requested when there are extenuating circumstances preventing the provision of the corresponding modules in the PLIDA Modular Product.
Attachments
Any supporting documentation in the form of an attachment (for example, ethics approval, more detailed scope descriptions) must be sent to mydataportal@abs.gov.au. The ABS admins will attach the file to your project proposal and you will see the file from the Attachments tab within the proposal.
Submit your project
Navigate through the project proposal using the Previous or Save & Next buttons. These are located at the top and bottom of each page.
You must complete all mandatory fields. The number of mandatory fields may change depending on responses to questions.
A warning box will appear highlighting any field missing mandatory information. You can use the link in the warning box to jump to the field that requires a response.

Image shows an error message box with the following text: "The form could not be submitted for the following reasons: Project outcomes is a required field."
Project overview
When the project proposal has been submitted the proposal will be locked from editing and can be found on the ‘My projects – Pending’ view.
If you need to set the project back to draft, please email mydataportal@abs.gov.au.
A project overview is available after a project proposal has been submitted.
The overview is a summary of the project for all researchers joined to the project and is broken down into:
- Project details, including project status of Draft, Submitted, Under assessment, Ready for approval, Pending approval, Approved and Active.
- Project Lead researchers, this can be one or more key researchers who can be the point/s of contact for the project and administration.
- Project Editor details, is one person from the project who can draft and submit the information held in the project proposal, including editing and submitting Change Requests.
- Researchers table shows Active researchers. Use the active menu to change status type to view Removed, or Pending. This table includes the researcher role on the project.
- Data packages shows Active Data packages. Use the active menu to change status type to view Removed, or Pending.
- Project Data Linkage Requests table shows all requests at their various status. When active the data package is listed in the Data packages table.
- Change Requests will reflect any submitted changes until the change is Active. Then the Project tables will update to the new active information.
- Clearance Requests table shows Pending clearance requests. Use the active menu to change status type to view, Closed requests, Draft requests or In progress requests.
To open:
- select the Project ID link from the My projects table, or
- from the ‘Project overview' link (top right) within the project proposal.
An active status means access is available for this project.
Data Linkage Requests move independently from the project proposal and can also be created and tracked from the Overview page. When a new data linkage is approved the data package will be added to your project proposal and become Active.
If you are the Project editor of a project, the Overview will also display a 'Close myDATA Project' button at the top of the page.
Project closure
Email reminders are sent to all active project researchers at:
- 2 months from expected end date
- 1 month from expected end date.
At this point the Project editor can choose to:
- extend the expected end date by submitting a change request form
- confirm the project is closing by confirming in the project overview.
The 'Close myDATA Project' button is located in the Overview at the top of the page under the title.
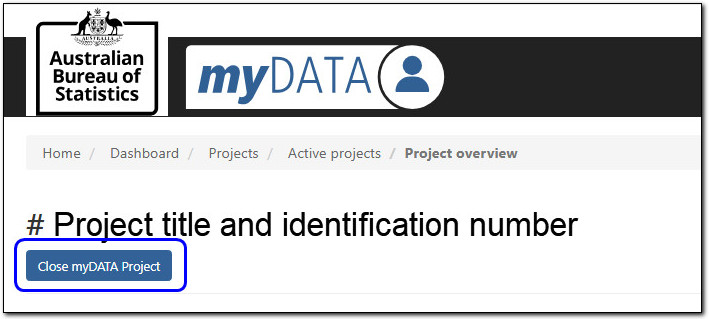
Image shows the top of a page titled "Project title and identification number".
Beneath the header is a button labelled, "Close myDATA Project" (highlighted in the image).
When selecting to close the project you must confirm that the project should be closed.
After confirming, there is a short survey to gather your experience, selecting Yes will take you to the survey.
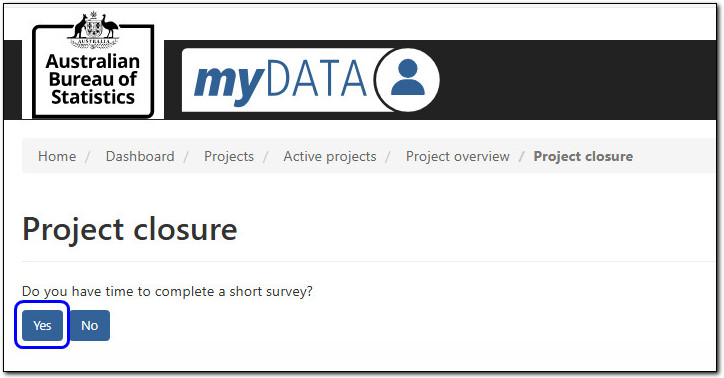
Image shows the top of a page titled, "Project closure".
Beneath the header is the text "Do you have time to complete a short survey?", followed by two buttons: Yes (highlighted in the image), and No.
Project closure survey is seeking input on:
Outputs
- What were the intended outputs of the project and if they were delivered
- and if relevant, why the outputs were not delivered.
Insights
- any key insights you have learned from this project that can be shared with the ABS
Publication
- Publication of outputs from the project have been sent to the ABS.
Outcomes
- intended outcomes and if they were delivered
- and if relevant, why the outcomes were not delivered.
Feedback on the DataLab access process, system or data accessed.
Change requests
Create, submit, and track requested changes
The Change request tile will allow you to draft, edit and submit changes for your project.
Their are two types of changes that can be requested:
- Organisations and People: add or remove partner organisations and researchers
- Project Details: change project details including project title, scope, data, objectives and outcomes, ethics and sensitive data sections and the project end date.
Only one Change request per type can be submitted at any one time.
Any active researcher on the project can generate the Change request, and after the form is generated, only the Project Editor can edit the details.
Generate a draft
To generate a Change request, select the 'Create Change Request' button. This button is available from all status menu tables (Draft, Pending, Approved and Closed).
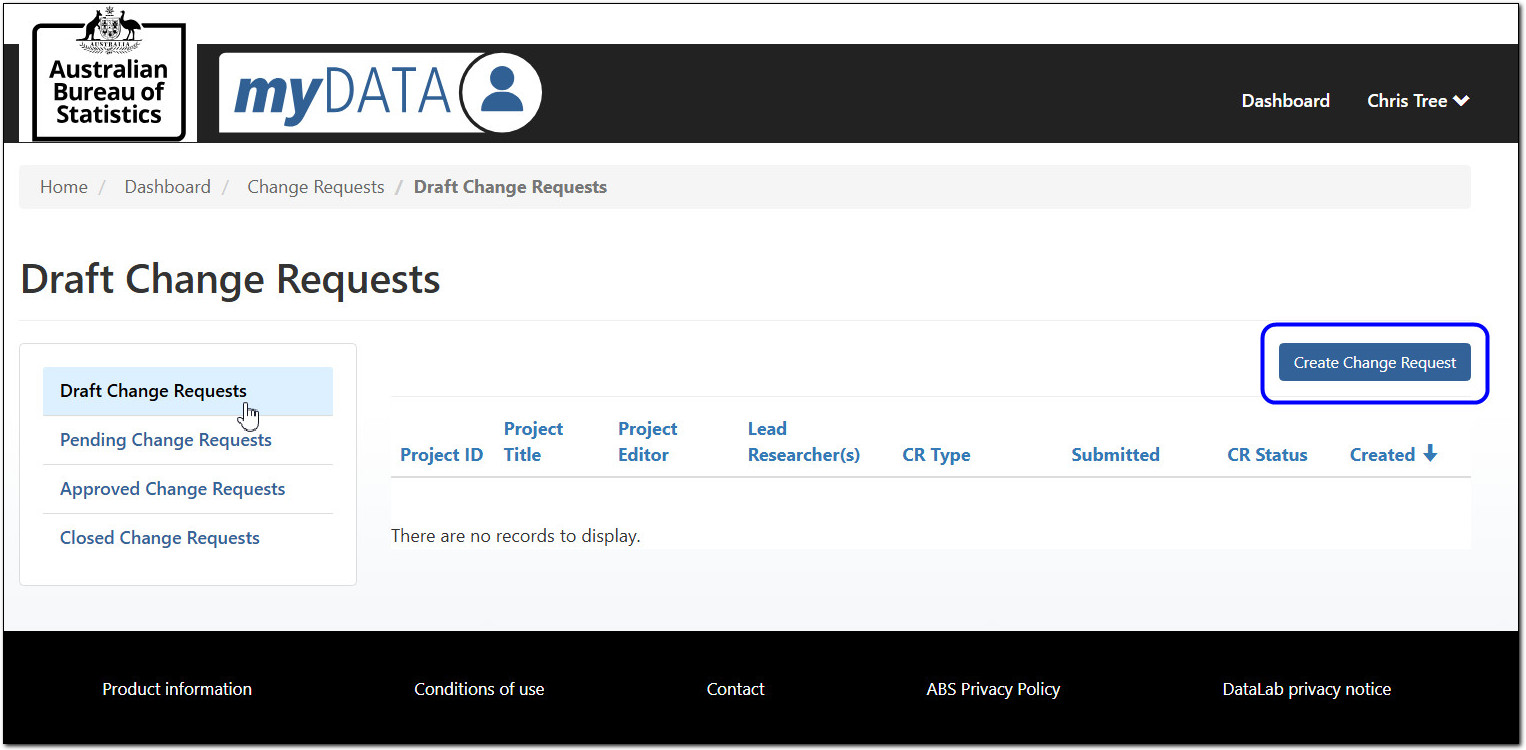
Image shows a page titled, "Draft Change Requests".
A vertical navigation menu on the left hand side contains four options: Draft Change Requests (currently selected), Pending Change Requests, Approved Change Requests, and Closed Change Requests.
The main section of the page is a table containing the columns: Project ID, Project Title, Project Editor, Lead Researcher(s), CR Type, Submitted, CR Status, and Created. The table in the image does not contain any records.
Above the table is a button labelled, "Create Change Request" (highlighted in the image).
There are 3 steps to generated the draft
- select your project
- select the type of change
- submit the form.
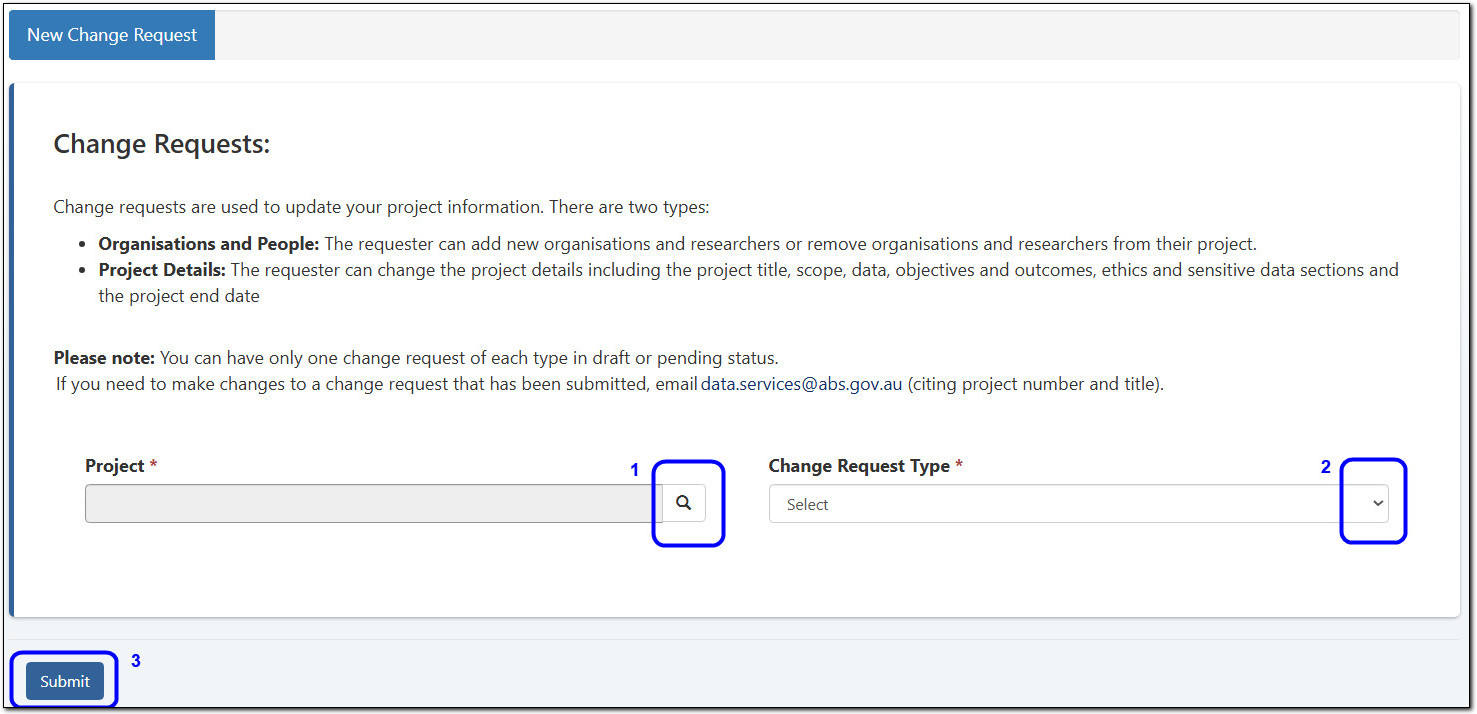
Image shows a pop-up box titled, "Change Requests", with the following text:
"Change requests are used to update your project information. There are two types:
- Organisations and People: The requester can add new organisations and researchers or remove organisations and researchers from their project.
- Project Details: The requester can change the project details including the project title, scope, data, objectives and outcomes, ethics and sensitive data sections and the project end date.
Please note: you can have only one change request of each type in draft or pending status.
If you need to make changes to a change request that has been submitted, email data.services@abs.gov.au (citing project number and title)."
Beneath the text are two editable fields next to each other. The field on the left is a search bar labelled, "Project". The magnifying glass symbol on the right hand side of the search bar has been highlighted in the image and labelled, "1".
The field on the right is a drop down menu labelled, "Change Request Type". The drop down arrow symbol on the right hand side of the menu bar has been highlighted in the image and labelled, "2".
It can take up to 20 minutes for the change request form to generate.
Organisations and People
- Only Active researchers will be available for edits.
- Any researchers with the status of Pending approval or Approved, will not be available for edits until they reach the status of Active.
Project Details
- Only Active datasets and data packages will be available for edits.
- Datasets, and Data packages that are Pending approval cannot be removed until the final status of Active is reached.
Edit the draft
When the Change request has been generated it will be available for the Project Editor to make changes. The draft is shown in the My Change Requests - Draft table.
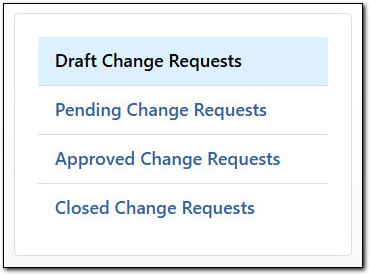
Image shows a vertical navigation menu with four options: Draft Change Requests (currently selected), Pending Change Requests, Approved Change Requests, and Closed Change Requests.
To edit, select the 'Edit Change Request' option from the action menu.
If you no longer require a change, select 'Withdraw Change Request'.
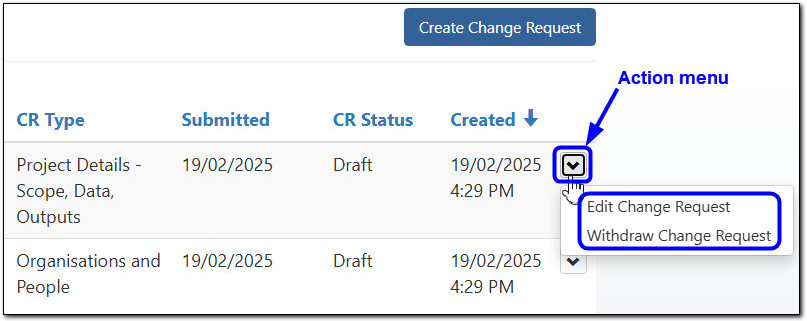
Image shows a table with the columns: CR Type, Submitted, CR Status, and Created.
To the right of each record in the table is a drop down button. In the image, the drop down button for the first record has been highlighted and labelled "Action menu". The button has been selected, showing a drop down menu with the options: Edit Change Request, and Withdraw Change Request.
Above the table is a button labelled, "Create Change Request".
The type of change generated will set what kind of changes can be made in that request.
To make changes to selected data packages, you will need to click the action menu (arrow) on the dataset row, then select 'View details'.

Image shows a table with the columns: Data asset, Dataset, and Justification Plain Text.
The records in the table are hierarchical, showing the selected data packages and the datasets that they belong to. To the right of each dataset record is a drop down button. In the image, the drop down button for the first dataset record has been selected, showing a drop down menu with the options: View details (highlighted in image), and Remove.
From the next screen you can add or remove the data packages that have been selected.
Submit and track the change request
When you have finished all the necessary changes, move through to the Submit tab and complete by selecting the 'Submit' button.
Change requests go through the same workflow statuses cycle as the project proposal.
You can monitor the progression from the Pending Change Requests table, CR Status column.
A email notification will be sent when changes have been implemented, and the changes will now be reflected on the Project and Project Overview page.
If you need to make additional changes after the request has been submitted, email mydataportal@abs.gov.au (citing project number and title).
Clearance requests
Create, submit and track clearance requests
To submit a clearance request, Login to myDATA and select the Clearance request tile from the dashboard.
You can monitor your request using the progress status (Draft, Pending, In progress and Closed).
More information on clearance rules and requirements can be found in DataLab clearance instructions.
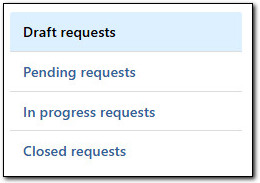
Image shows a vertical navigation menu with four options: Draft requests (currently selected), Pending requests, In progress requests, and Closed requests.
Create
You can submit requests for the following:
- Input
- Output
- Transfer requests
- Clearance enquiry.

Image shows a horizontal menu bar with four buttons: Create Input Request, Create Output Request, Create Transfer Request, and Enquiry.
Project selection
To submit a request, first select the project. Do this by:
- using the magnifying glass
- tick one project
- press Select button.
This will link your request to the project (Input, Output or Transfer).
Select Next to complete the request form. Your request will be visible by all active researchers on the project.
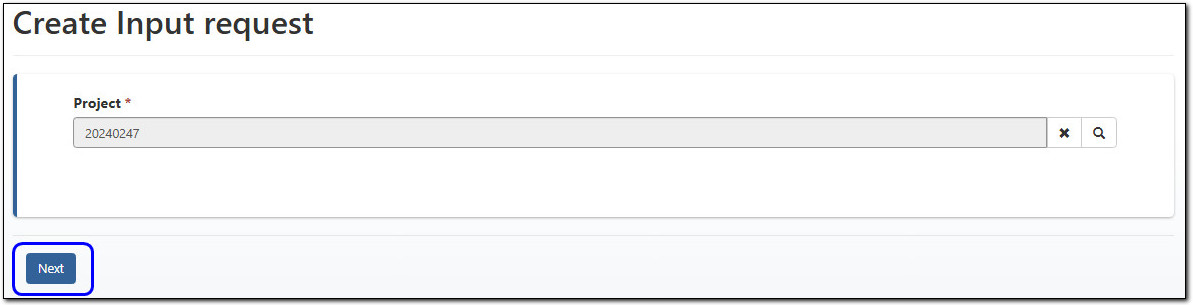
Image shows a page titled, "Create Input request". Beneath the header is a grey search bar labelled, "Project", which in the image contains the text, "20240247". The right hand side of the search bar contains a cross symbol and a magnifying glass symbol.
At the bottom left of the page is a button labelled, "Next" (highlighted in image).
Withdraw requests
Requests can be withdrawn by any project researcher from a status of Draft or Pending.
The withdraw option is available from the action menu on the table row.
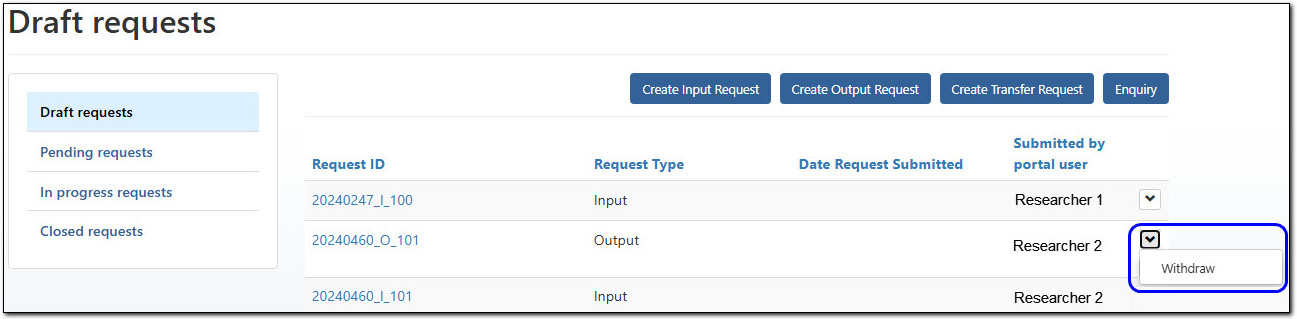
Image shows a page titled, "Draff requests".
A vertical navigation panel on the left side contains four options: Draft requests (currently selected), Pending requests, In progress requests, and Closed requests.
The main section of the page is a table with the columns: Request ID, Request Type, Date Request Submitted, and Submitted by portal user. To the right of each record in the table is a drop down button. In the image, the drop down button for the second record in the table has been selected, showing a drop down menu with the option: Withdraw (highlighted in image).
Above the table are four buttons: Create Input Request, Create Output Request, Create Transfer Request, and Enquiry.
Virtual Machine (VM) name
You will need the VM name to submit your clearance request.
Your VM name can be found in DataLab in the 'My Projects' option in the left sidebar. The VM name is listed under machine details.
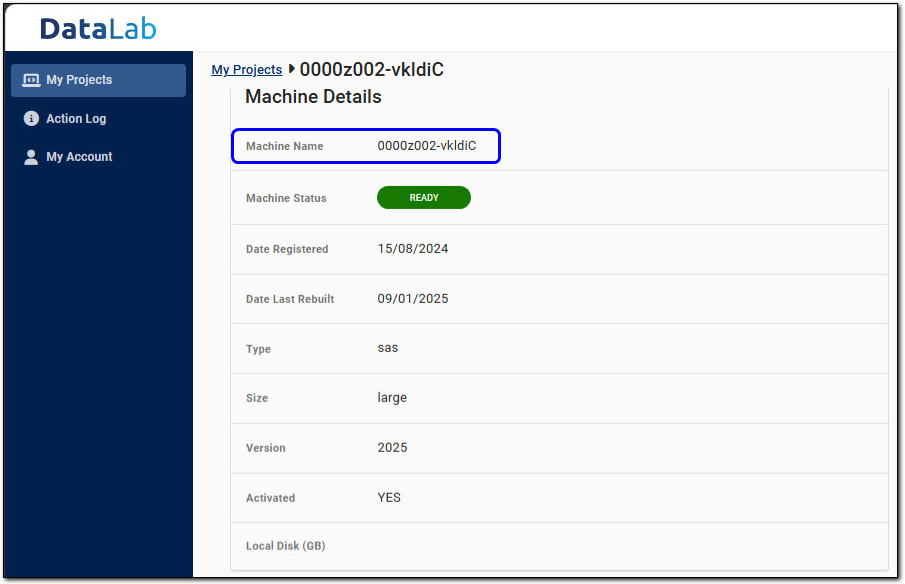
Image shows a page in DataLab titled, "Machine Details". The breadcrumb navigation at the top of the page shows: "My Projects > 0000z002-vkldiC".
A vertical navigation panel on the left hand side contains three options: My Projects (currently selected), Action Log, and My Account.
Beneath the title of the page is a table without headers, containing the following details about the currently selected machine:
- Machine name
- Machine status
- Date registered
- Date last rebuilt
- Type
- Size
- Version
- Activated
- Local disk (GB)
In the image, the row containing the machine name is highlighted.
Input requests
Input requests can be used to import the following into your project:
- aggregate data
- concordances
- supporting material, and/or
- statistical code.
Select the Create Input Request button to complete the form.
We will not add the following to the DataLab:
- Names of people or businesses
- Addresses or specific location coordinates (longitude and latitude)
- Large amounts of free text where it is not possible to check for names and other identifying information.
Output requests
DataLab outputs must be approved and cleared by the ABS before being shared. Output requests can take up to 2 weeks to complete.
Clearance Request best practice:
- apply all necessary output rules to your analysis and provide evidence of this
- reviewing well-organised and clearly described files is quicker and more efficient
- requesting only what you need ensures a more efficient and streamlined process.
Do not copy or remove anything (for example data, code, notes) out of the DataLab yourself as per DataLab agreed conditions.
This covers not including any counts or data from DataLab in any correspondence.
To request output clearance:
- format the data (within your VM) with clear headings and labels (ODS or ODT format is preferred)
- apply the appropriate output rules and prepare evidence in a separate file
- move the relevant files, including supporting evidence, to a new sub-folder in the output (O:) drive
- select the Create Output Request button and complete the form.
Transfer requests
This request is to move code and other files that do not contain data between active DataLab projects.
Ensure there are no counts or IDs anywhere, including in logs or comments.
To request transfer clearance:
- check files do not contain any data
- move the relevant files to a new sub-folder in the output (O:) drive
- select the Create Transfer Request button and complete the form.
To transfer files from a closed project, contact: mydataportal@abs.gov.au.
Moving files that contain data, submit an Output request, ensuring all output rules are met. Within the 'Additional comments' field note that you want data transferred to another project.
Enquiry request
The Enquiry button will create an email message to the Clearance team.
Do not send any uncleared data in your enquiry.
Troubleshooting
Helps you with application and support steps associated with the myDATA portal
Stuck on 'Your account is almost ready' page
When you log in to myDATA for the first time, you are prompted to confirm your details. You need to click the ‘Submit’ button at the bottom of the page to confirm, and then you should be able to see the main myDATA dashboard.
If you are still seeing the 'Account almost ready' page and not the myDATA dashboard, try (one or many of) the following:
- Press Ctrl F5
- Clear your browser cache and delete cookies, close the browser, then open it and trying to log in again
- Try a new browser session in private mode (Edge Settings 'New InPrivate window')
- Try a different browser, recommended browsers are:
- Google Chrome, latest three major releases
- Microsoft Edge, latest three major releases
- Mozilla Firefox, latest three major releases
- Apple Safari, 13 or later
Still not working? Please contact mydataportal@abs.gov.au to discuss next steps.
Okta activation email
When logging in and receiving the following error 'Unable to sign in', it is because the step to activate your account has not been completed.
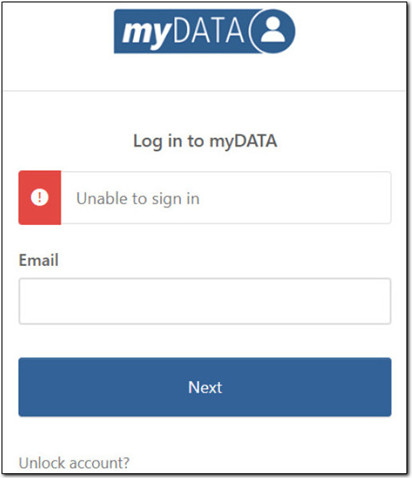
Image shows the Unable to sign in error. Users are required to complete activation steps before accessing myDATA.
Locate the email from @okta.com domain (it could be in your spam/junk folder), or contact your IT department as your organisation's firewall may be blocking this domain.
If you are still having issues, contact mydataportal@abs.gov.au to discuss next steps.
My password isn't working
If your password is not working, click on the 'Forgot password link' below the password box. This will send you an email.
Select the link 'Enter a verification code instead', and from the email 'Account password reset', locate the code and enter it to your browser session.
You can now create a new password.
If you have entered your password incorrectly too many times, then your account will be locked. The error looks like this "Unable to sign in".
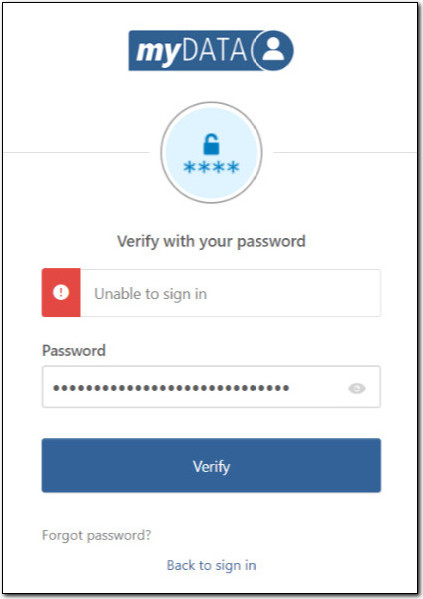
Image shows the error "Unable to sign in" and displays to the user when the account is locked.
Please contact mydataportal@abs.gov.au to discuss next steps.
One time code not appearing on authenticator (MFA)
Check you are using the correct Google multi-factor authentication (MFA) App. If unsure contact mydataportal@abs.gov.au.
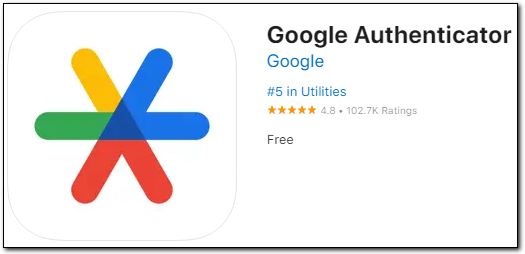
A screenshot of the Google Authenticator app in the App Store, providing the following information:
- It is owned by Google,
- It is #5 in Utilities (at time of screenshot),
- It has a rating of 4.8/5 from 102.7K reviews (at time of screenshot),
- It is free.
Do not use Single Sign On (SSO)
Organisations may use Okta to access other systems, and as such, the option to select SSO may be presented to you.
When using myDATA it is recommended that a separate private browser window be used, as sometimes errors occur if you use Okta for other systems and are signed into them with the same username (your email address) that myDATA is using.
If you see SSO, do not use this function.
Log in failed
Firstly, check there is no planned outage banner displaying. Scheduled maintenance happens on a regular basis, and banners are shown on the myDATA landing page to advise when this is occurring.
See Portal features, point 5 Banner messages, to see where we post communications.
Also, check you are entering the authentication code from the app on your phone, and not your password where the code should be entered. You will see the below error if this is the case.
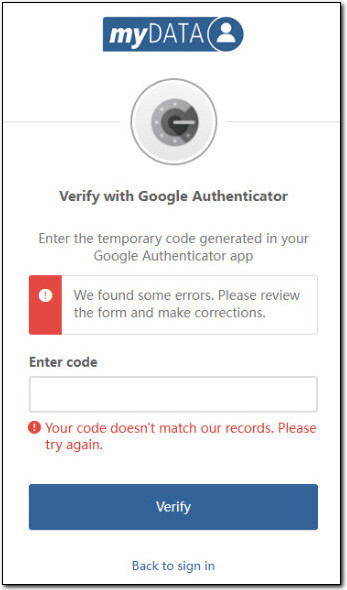
Image shows the verify with authenticator error when entering an incorrect code. User is required to use the code from the authenticator app.
Locked from editing my project proposal
All fields which have formatting tools (rich text) will allow 32,000 characters, however using the formatting tools will introduce hidden HTML tags within the field and will count towards the overall character limit.
The title field has a limit of 100 characters.
Keep track of the project application
Each project proposal goes through various stages throughout the application and approval process. Status can be monitored from the Overview page.
Project proposal is locked
Project proposals can only be edited while in Draft status, and only by the Project Editor. More details are described in Workflow status.
If the Project Editor is unavailable or the project is locked due to other workflows, please contact mydataportal@abs.gov.au to discuss next steps.
Leaving a project
If you are leaving a DataLab project, advise the project editor to submit a Change Request as soon as possible.
In accordance with the Declaration of Compliance form that is completed before joining a project, it is mandatory that you inform the ABS of a change to your project. Subsequently, a change request must be submitted to ensure compliance, maintain accuracy and to avoid incurring further project fees. For more information, please see Using DataLab responsibly
Timed out of myDATA
Sessions that are inactive for 30 minutes or more will be timed out of their active session. If you have a project proposal underway the autosave function will save your last input.
Try again
Even systems have bad days, before emailing for assistance try again.
If the error remains then email us at mydataportal@abs.gov.au and we will assist.