Custom data
Create, edit, download and upload your own custom variable groupings
Create and save a custom data group within TableBuilder
You can create your own grouping of categories within a variable. These are also known as 'recodes'. Custom groups can be saved in TableBuilder or downloaded and shared with other users for uploading. Custom data is useful if you want to create your own classification or load more recent electoral boundaries. Once you create your grouping, you can add it to a table like any other variable.
You can only combine categories from one variable or one level of a variable. You cannot create a new custom data group using:
- two or more original variables, such as Sex and Age - an error is displayed if you try to add more than one variable
- categories from two different levels of a hierarchical variable, such as NSW and Melbourne - TableBuilder allows you to build and save a multi-level hierarchical variable, but does not allow you to add it to a table
To start creating your custom data, click on the Custom data button at the bottom of the left panel in Table view.
1. This example uses the 2016 Census - Cultural Diversity dataset. Click on the Custom data button.

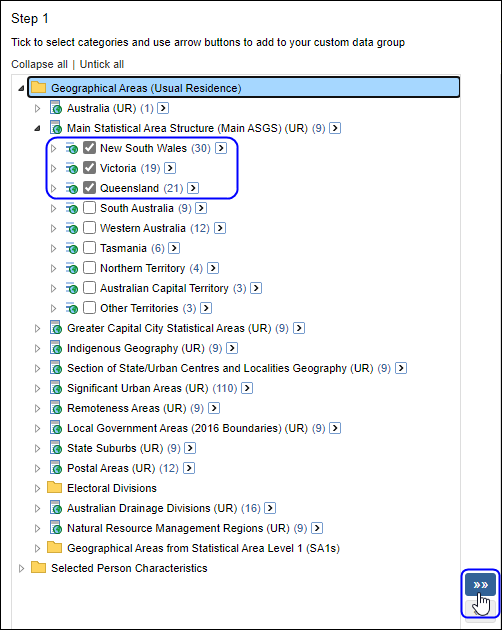
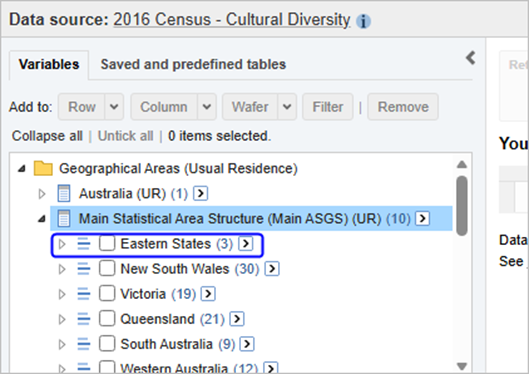
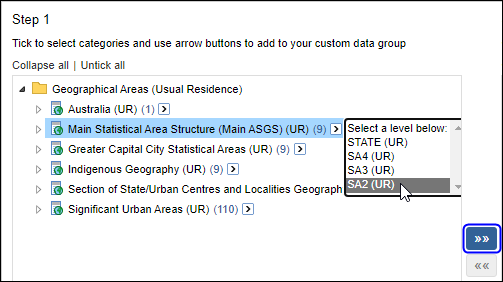
2. In the Step 1 panel, select the categories you want to group together, then click on the double arrows to add them to the panel on the right.
For example, to create a group of States using Main Statistical Area Structure (Main ASGS), select the States from the list and click »»
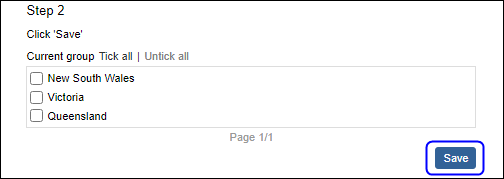
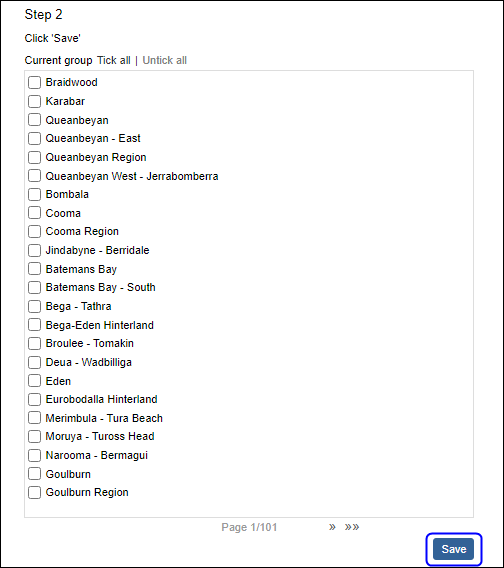
3. The selected categories now appear in the Step 2 panel on the right. After adding all the categories you need, click Save.
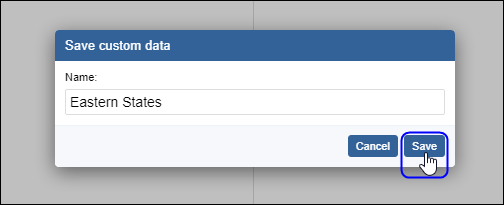
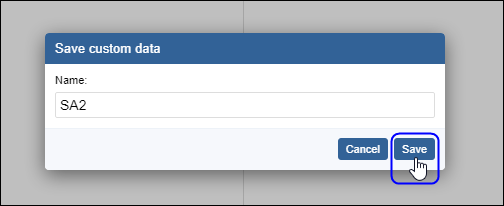
4. Enter a name for your new custom group and click Save.
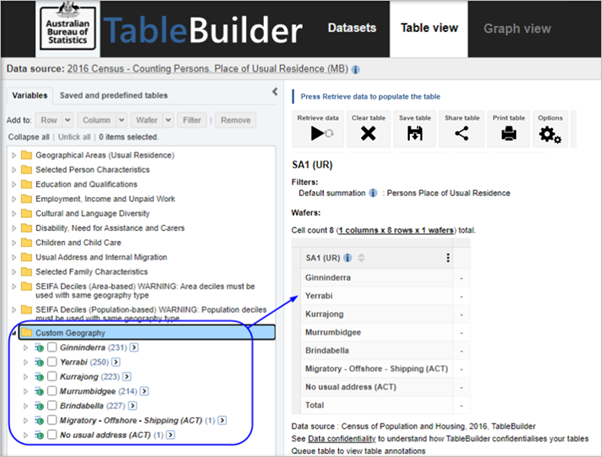
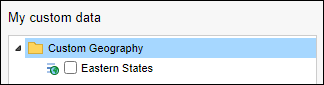
5. TableBuilder adds the new group to the My custom data list in the left panel of the Custom data view.
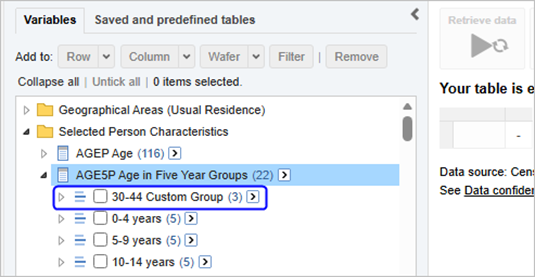
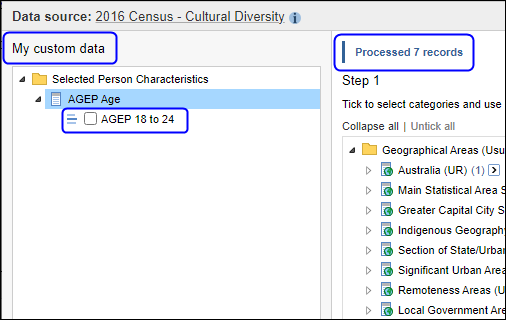
6. Your saved custom data group is now available in the left panel of the Table view. Custom variables are found with the original variable as pictured below.
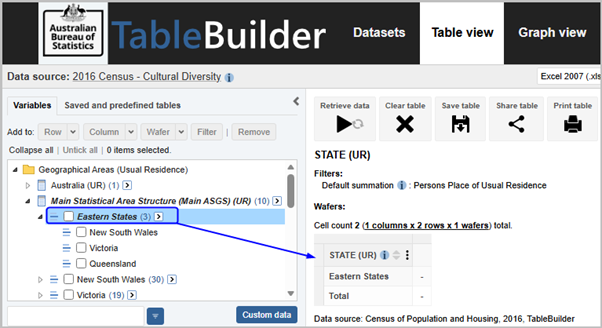
7. The custom group can be added to a table.
8. You can edit a group that you have created previously. However, if you have used your custom group in a saved table, the old version of the group will continue to display in the table. To update to the new version, you need to remove and re-add it to the table.
Download a saved custom data group
You can download a Custom data group you have built in TableBuilder to share with other users.
1. In Table view click on the Custom data button at the bottom of the left panel.

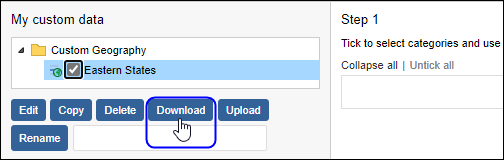
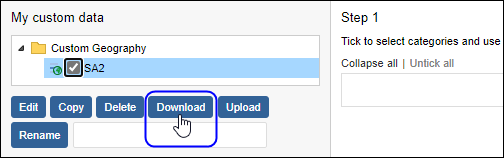
2. In the My custom data panel, select the tick box next to the group to be downloaded and click the Download button.
3. Depending on the browser, the file either saves to the default downloads folder, or a prompt appears to save or open the file. For example:
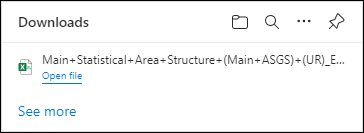
4. The custom group is downloaded in a Comma Separated Values (CSV) format, and you can edit it outside TableBuilder or share it with other users. They will need to have access to the same original dataset to be able to use your custom data.
Download a classification to edit outside TableBuilder
You can download a whole classification to edit outside TableBuilder. This option is useful for very large classifications, such as geographies, or where you would like to use a TableBuilder classification to build your own classification outside TableBuilder
1. This example uses 2016 Census - Main Statistical Area Structure (Main ASGS) (UR). Click on the Custom data button on the left panel in Table view. Then select the whole classification you are interested in using the single arrow > at the end of the variable name. In this example, SA2 is selected. Click on the double arrow »» to move the selected classification to the second panel.
2. Once the classification has loaded, it may display over more than one page. You can view other pages using the page navigator below Step 2 panel. Click the Save button.
3. Choose a unique name for your classification.
4. In the My custom data panel on the left, select the tick box next to the group to be downloaded and click the Download button.
5. Depending on the browser, the file either saves to the default downloads folder, or a prompt appears to Save or Open the file. For example:

6. The custom group downloads in a Comma Separated Values (CSV) format, and can be edited outside TableBuilder.
Edit a downloaded custom data group outside TableBuilder
When a custom group is downloaded as a file in Comma Separated Values (CSV) format, the file can be opened and edited in a text editor or application such as Excel. It is important to be careful when editing a saved custom groups file in Excel, as it may make changes to the data that will prevent the file from opening in TableBuilder again. For example, Excel may strip leading zeros from codes in the file, such as ValueCode, which will not allow the data to be loaded back into TableBuilder. It is best to use a text editor instead, such as UltraEdit, to upload the new group.
A downloaded custom group opened in a text editor.

A downloaded custom group opened in a spreadsheet.

The first row contains the headings, and each subsequent row represents a single category in the custom variable group. The heading row must not be edited or the file cannot be uploaded to TableBuilder.
Rows can be added, edited or removed (except the header row) to change the composition of the group.
Upload a custom data group
Custom group files that have been created or edited in your own system or shared from other users can be uploaded into TableBuilder.
To upload a custom group:
- You must have access to the dataset that the custom group was created in.
- The dataset that relates to the custom group must be open.
- Upload files must be in CSV format.
- The structure of the custom group file must be retained using the same column headings.
- The name of the group in the saved file must not be the same as an existing custom group. TableBuilder displays an error if a custom group with the same name as an existing group is attempted to be loaded. Delete the existing custom group, rename it, or rename the group saved in the file (by changing the value of the GroupName in the final column).
- Only one saved group can be uploaded at a time.
1. To load a custom group from a file, open the dataset that was used to create the recode, and click on the Custom Data button at the bottom of the left panel in the Table view.

2. In the My custom data panel, click the Upload button.

3. Browse to the location where you saved your custom group file and select the file. When uploaded, TableBuilder adds the new group to the My custom data panel.
4. If there is a problem with the upload, an error message is displayed.
Common errors when uploading a custom data group:
| Error | Explanation |
|---|---|
| | Upload error. 61 out of 65 lines successfully imported. A values code or name is not found. | The ValueCode column, which is the numeric code for a variable name, may be missing leading zeros. Check if the classification you have edited includes leading zeros. |
| | Upload error. 0 out of 1,464 lines successfully imported. A group with this name already exists. | The Custom Data group has previously been uploaded or the name has already been used. You will need to change the value of the GroupName in the final column to load the file. |
| | Upload error. 0 out of 1,464 lines successfully imported. A tables code or name is not found. | The upload file doesn't match the dataset that is open. You will need to open the matching dataset to load the file. If you already have the correct file open, the information in the FactTableCode or FactTableName may be incorrect. You can check what this should be by downloading any custom data from the same dataset. |
| | Uploaded file has invalid CSV header. Expecting column names FactTableCode, FactTableName, FieldCode, FieldName, ValueSetCode, ValueSetName, ValueCode, ValueName, GroupName but read [, FactTableName, FieldCode, FieldName, ValueSetCode, ValueSetName, ValueCode, ValueName, GroupName] | The header row contains an error. Check the header row in your file to ensure it has the correct names, as listed in the examples pictured above. |
| The requested URL was rejected. Please consult with your administrator. | This message may be caused by a number of different actions. In this context it may be caused by trying to load an incorrect file type, such as an XLS. Only CSV files can be used when uploading Custom Data Groups. |
| No error but file does not upload. | Your upload file may be too large. The maximum upload file is 20 million bytes (19.07MB). |
Upload Commonwealth and state electoral divisions and local government areas
Commonwealth electoral divisions (CED), state electoral divisions (SED) and local government areas (LGA) boundaries change over time. ABS has prepared upload files to assist users to update the boundaries available within Census TableBuilder.
TableBuilder upload files for CEDs, SEDs and LGAs are available for use with Census 2016 datasets:
Australian Statistical Geography Standard (ASGS): Volume 3 - Non ABS Structures (see Downloads tab)
Earlier boundaries are also available using SA1s for use with Census 2011 datasets:
2016 Commonwealth Electoral Divisions
2012 Commonwealth Electoral Divisions
1. Download CSV file from the Downloads tab in Australian Statistical Geography Standard (ASGS): Volume 3 - Non ABS Structures and save it to your computer.

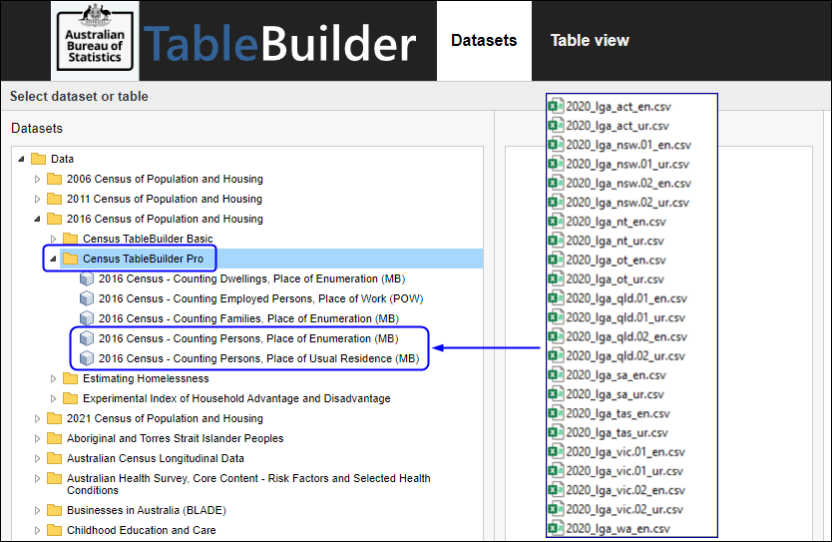
2. Files are available for Australia and for each state and territory. These files are suitable for use with the following 2016 Census of Population and Housing - TableBuilder Pro datasets:
2016 Census - Counting Persons, Place of Enumeration (MB) - compatible files are annotated with en (enumeration)
2016 Census - Counting Persons, Place of Usual Residence (MB) - compatible files are annotated with ur (usual residence)
3. Log into TableBuilder and open the dataset you are interested in. This example uses 2016 Census - Counting Persons, Place of Usual Residence (MB).
- Click on to the Custom data button on the left panel of the Table view.
- Click the upload button at the bottom left of the screen.

4. Find the location where the CED files have been saved and select the region you are interested in (Australia, state or territory). This example uses 2020_lga_act_ur_csv.

5. When the upload has completed, a message appears on the right to confirm the number of rows that have been loaded from the CSV file (not including the heading row). The uploaded custom data appears in the My custom data panel under Custom Geography. If you receive an error when uploading a file, check the errors and causes listed in the Upload a custom data group section above.
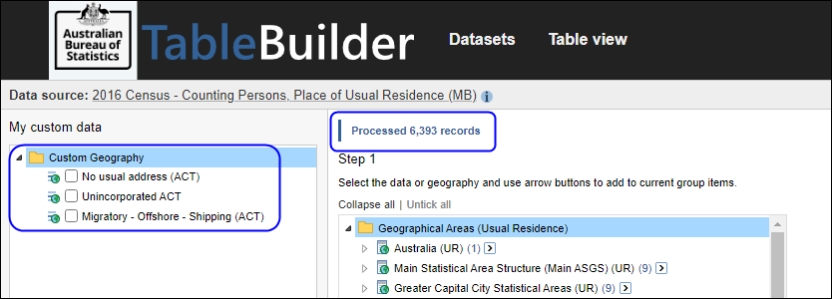
6. In the Table view tab the custom data you uploaded appears under the Custom Geography folder. You can select multiple tick boxes at once by holding down the Shift key to add the NSW CEDs to a table.