User guide
How to access SEAD, navigate the portal, launch your remote workspace and manage your account
Logging into the SEAD portal
SEAD conditions of use
By accessing SEAD, you are confirming you are authorised to do so, and acknowledge you have read and agree to comply with the conditions of use.
Log into the SEAD portal to access information and settings related to your profile, project, and launch your virtual machine (VM).
Note: For security reasons, user accounts will be automatically disabled after 45 days of inactivity and access to your virtual machine(s) will be suspended. The project and all associated data remain unaffected. Notifications are sent by email 14 days and 3 days prior to the account being suspended. You will need to log in to the SEAD portal within the 45 days to reset this timer. To reactivate a disabled account, contact your SEAD administrator.
New users
Multi-factor authentication
SEAD uses multi-factor authentication to provide a secure login environment.
You will need to download the Microsoft Authenticator application to your smart phone from the App Store (for iOS) or Google Play (for Android) to fulfil the login sequence.
Ensure that the authenticator is published by Microsoft, as SEAD only supports Microsoft Authenticator.
Logging in
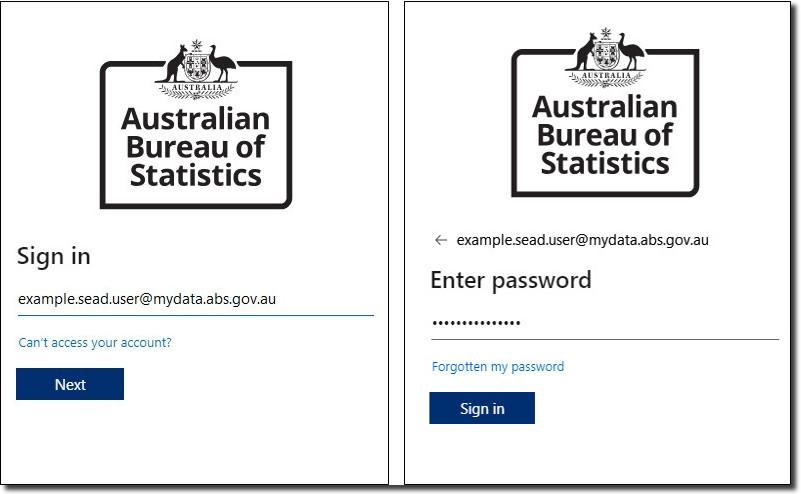
- To access the SEAD portal, go to https://sead.abs.gov.au
- The first time you log in, you will be required to enter your username and password contained in the email delivered by the system when your account is created.
Note: All SEAD accounts use the @mydata.abs.gov.au domain format.
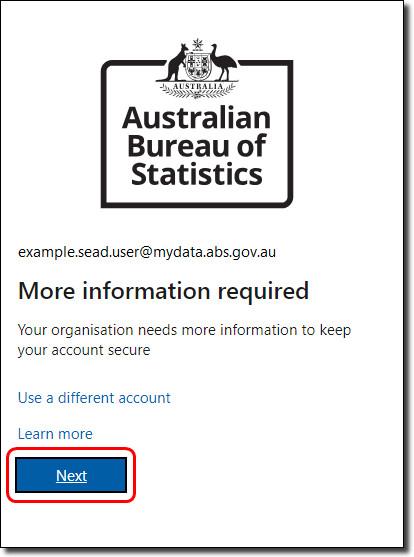
- You will be presented with a ‘More information required’ request, click ‘Next’.
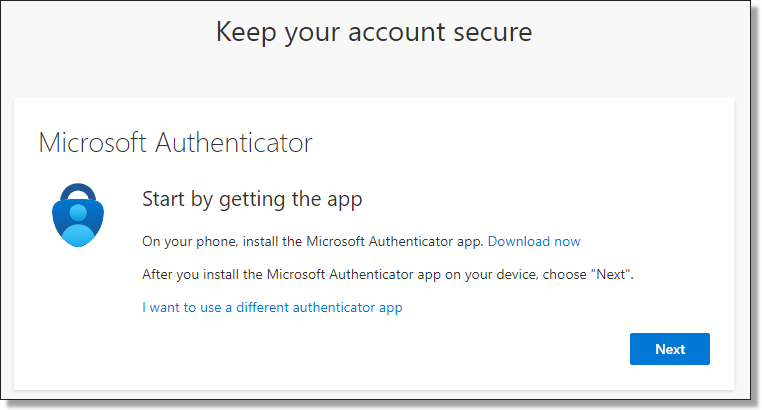
- The following screen will ask you to download the Microsoft Authenticator application. If you have already downloaded the application as advised above, proceed by clicking 'Next'.
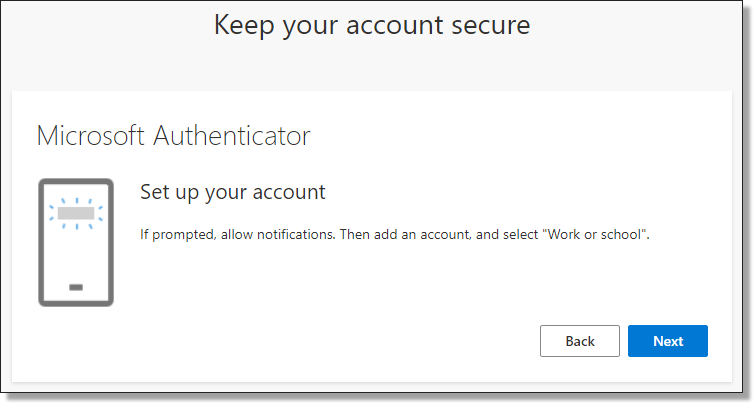
- You will then be guided to open your Microsoft Authenticator application and add a ‘Work or school account’.
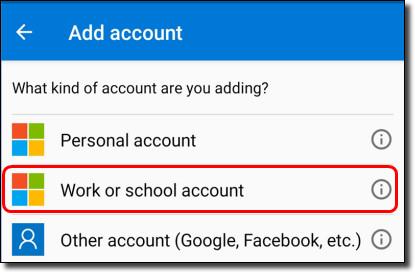
- Once you have selected a 'Work or school account', click ‘Next’ from your browser.
- The following screen presents a QR code to scan using your Microsoft Authenticator application. Initiate the scanning function by clicking 'Scan the QR code' from your application, then hover your phone camera over the QR code shown on your browser screen.
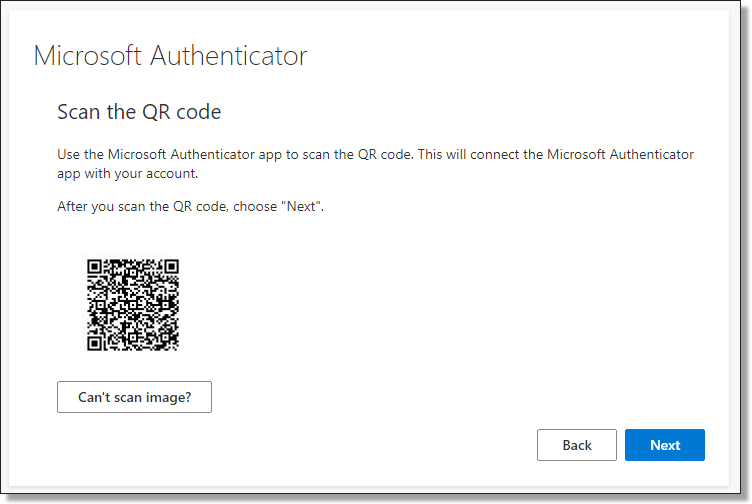
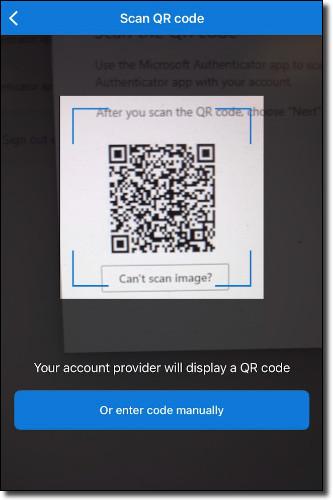
- Once scanning is complete, click ‘Next’ on your browser screen. You will be asked to select the security number shown on your browser screen into your Microsoft Authenticator application, once complete, click ‘Next’.
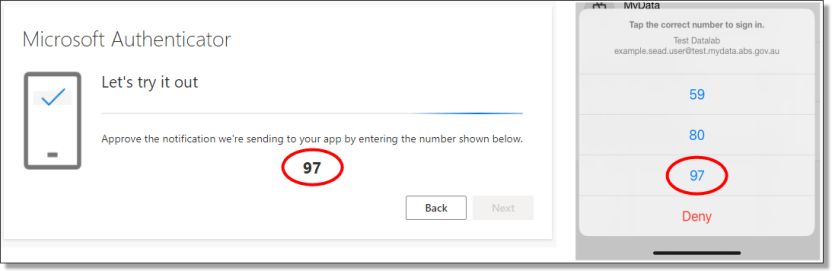
- After entering the security number and receiving approval from your Microsoft Authenticator application, you will see a ‘Notification Approved’ confirmation on your browser. Click ‘Next’ then 'Done' to proceed to updating your password
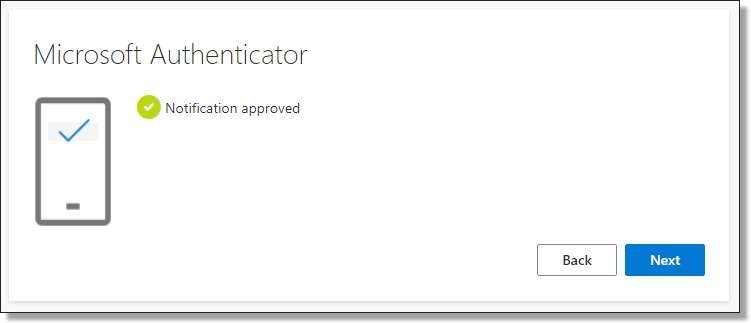
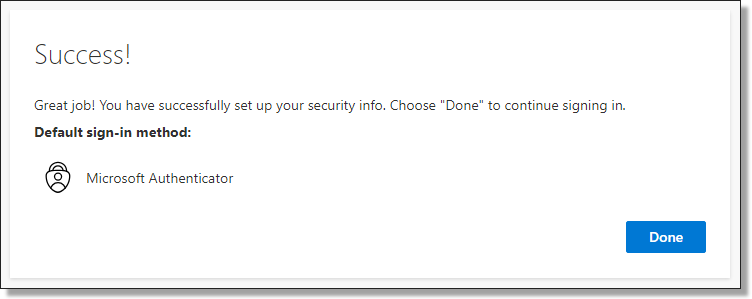
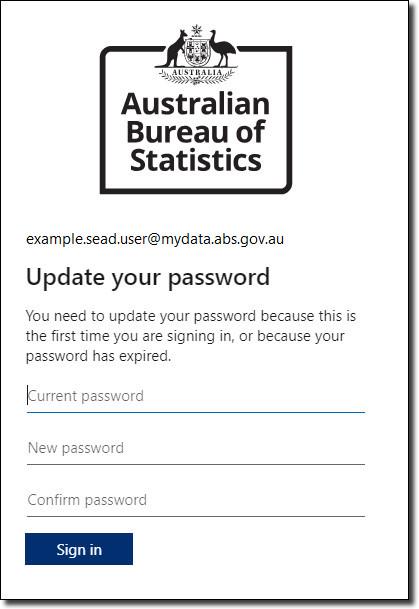
- Once you have returned to the sign in page, you will be asked to set up a new password for your account. Your password cannot contain your user ID. It must be a minimum of 8 characters and contain at least three of the following:
- Upper-case letters A – Z,
- Lower-case letters a - z,
- Numbers,
- Special characters @ # $ % ^ & * - _ ! + = [ ] { } | \ : ' , . ? / ` ~ " ( ) ;
- After updating your password, or when logging in for the first time, or after having your authentication methods reset you will be prompted to add a second verification method.
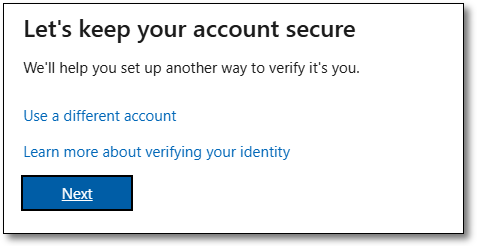
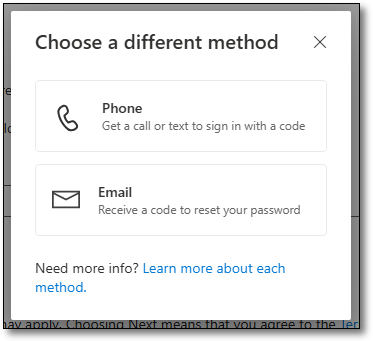
The default method is a phone call with automated prompts for you to follow. If you prefer to use a different method, select ‘I want to set up a different method’. From here you can choose either a phone call or text message with a sign in code, or email. You can skip the setup of a second verification method, however you will be prompted to complete it every time you log in to the SEAD portal.
- To proceed with the default method, enter your country code and phone number and select ‘Next’.
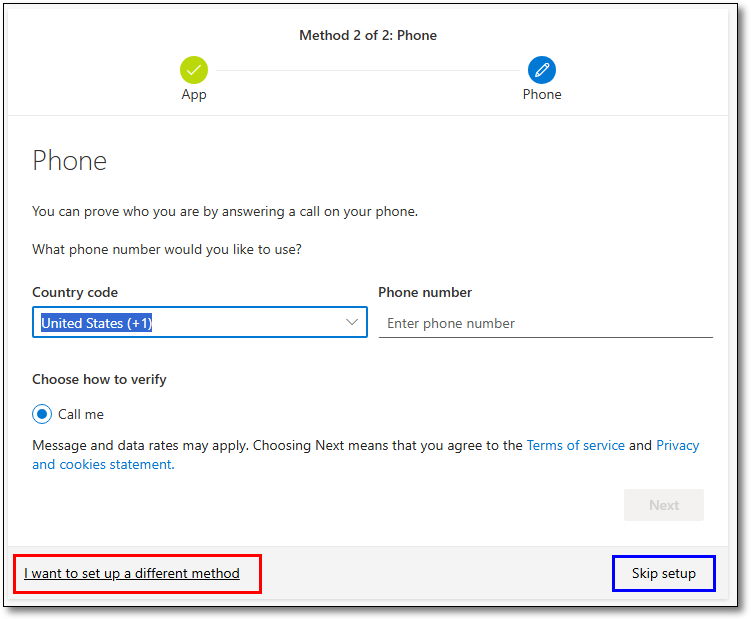
- You will receive a phone call to your mobile device using the phone number entered. Answer the call and follow the prompts provided, the verification status will be displayed in your browser.
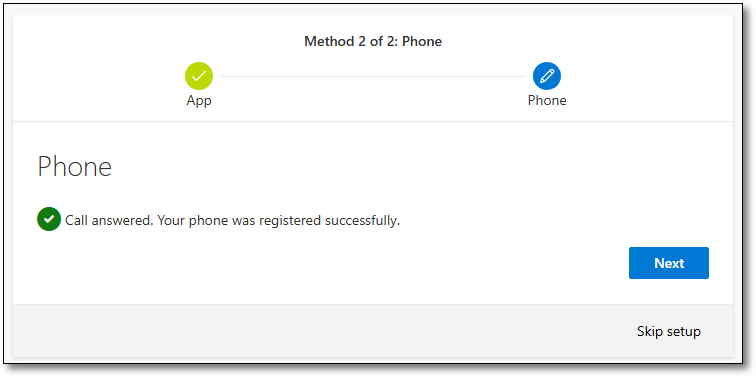
- After successfully verifying your mobile device your browser will update with 'Call answered. Your phone was registered successfully'. Click 'Next' to proceed.
- You will then receive a 'success' page, confirming the details were successfully registered. Select ‘Done’ to proceed to the SEAD portal.
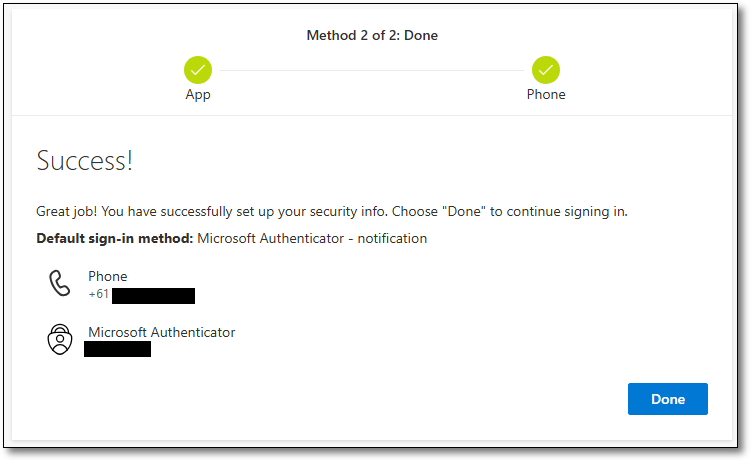
Register a passkey
After approving the MFA sign in steps, users will be prompted to add another verification method. This will allow you to create a passkey, which lets you sign in using your fingerprint, face recognition, device PIN instead of entering a password and completing a separate MFA verification for added security. This is currently optional for users but will be enforced from early 2027. This setup only needs to be completed once.
- To create a passkey, select ‘Next’.
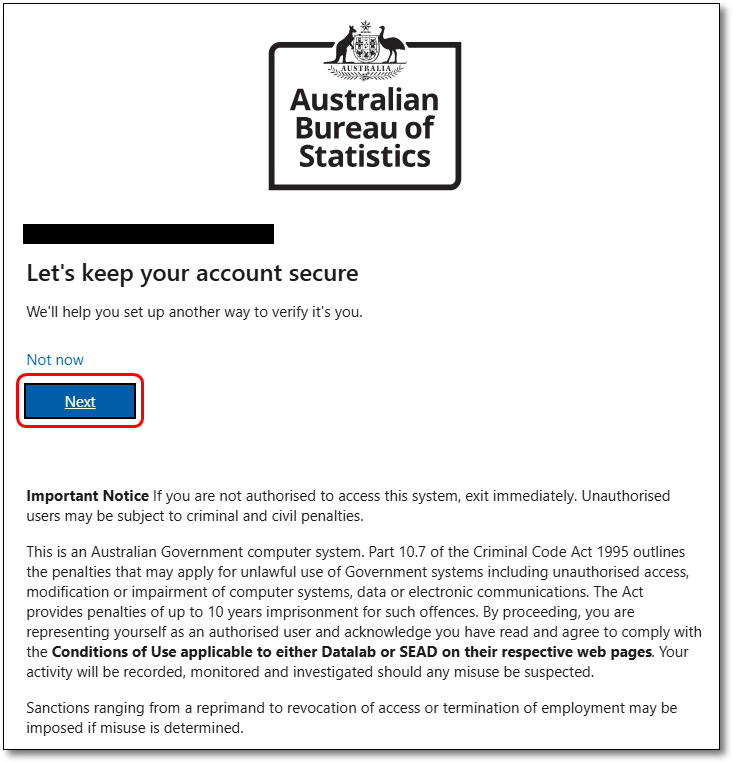
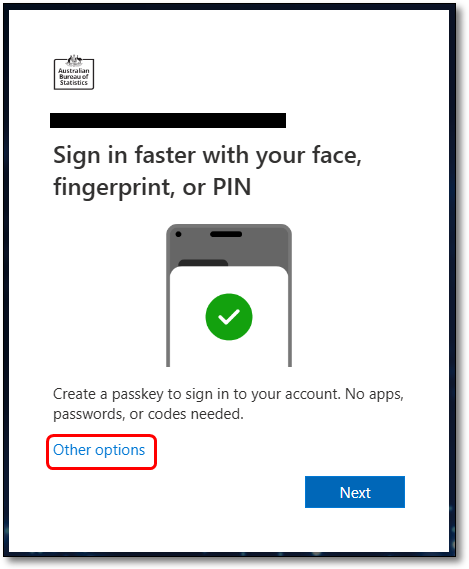
- On the following page select ‘Other options’. Selecting 'Next' on this page will prompt the browser passkey setup which has been disabled in SEAD.
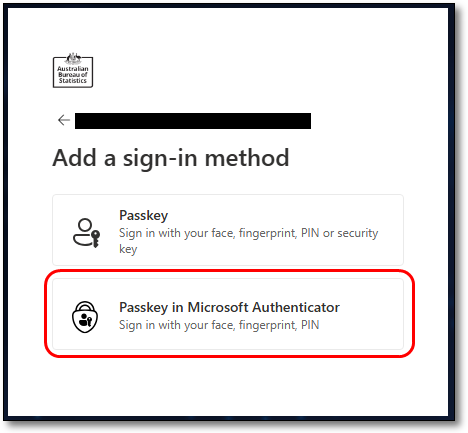
- Select the ‘Passkey in Microsoft Authenticator’ option.
- On the following page you will be notified that to create a passkey using a device running at least Android 14 or iOS 17 and that you have the latest Microsoft Authenticator version installed. If you meet these requirements, select ‘Next’. You will be directed to open the Microsoft Authenticator app on your device.
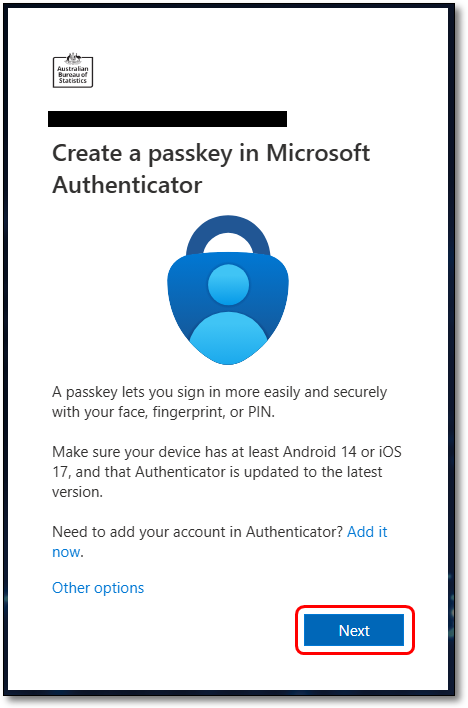
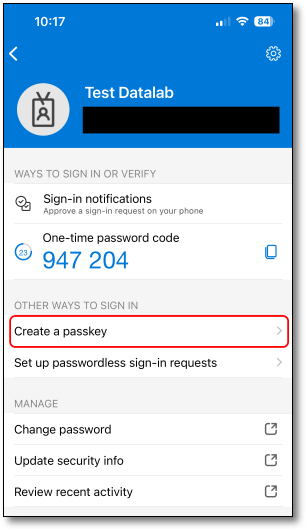
- On your mobile device, open the Microsoft Authenticator app and select your SEAD account from the accounts list. Under ‘Other ways to sign in’ select ‘Create a passkey’.
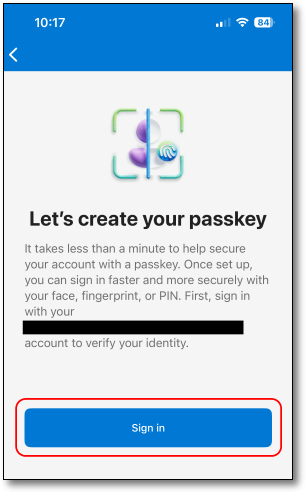
- You will be prompted to sign in to your SEAD account. Select ‘Sign in’, enter your SEAD password and confirm the sign in prompt once it appears.
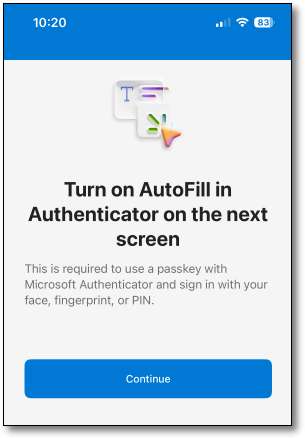
- After signing in, you may be prompted to turn on Autofill in Authenticator if it is not already active. Select ‘Continue’ and confirm the settings change pop-up.
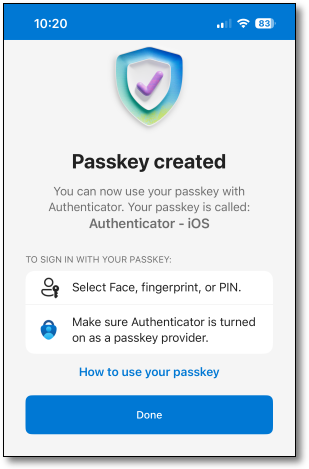
- Once completed you will have successfully created your passkey. Return to the SEAD web portal to continue signing in to your account.
Returning users
- To access the SEAD portal, go to https://sead.abs.gov.au
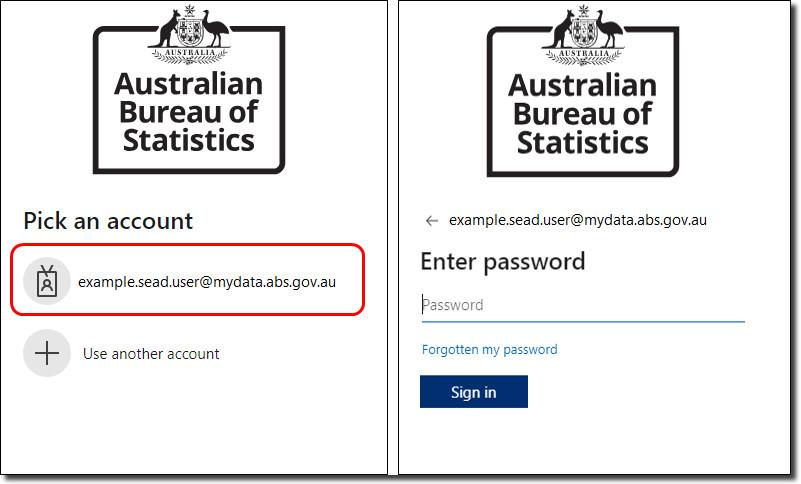
- For returning users, your account will already be available to select. All SEAD accounts use the @mydata.abs.gov.au domain format. Click on your account, then enter your password to sign in.
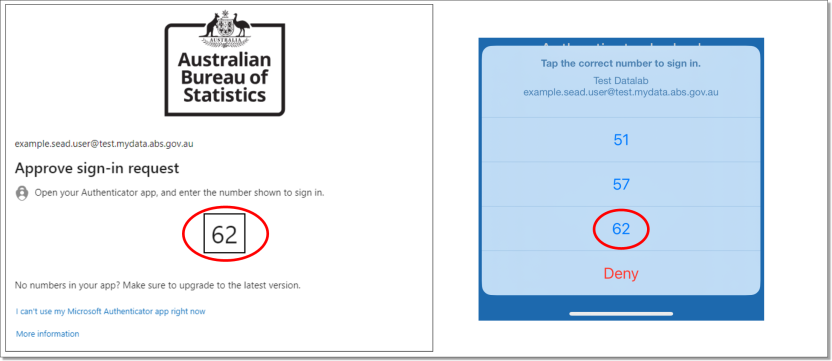
- Once you have entered your credentials and select ‘Sign in’, you will receive a notification from the Microsoft Authenticator application on your phone asking you to perform a “number match”. Enter the numbers shown on your browser screen into the authenticator application to proceed.
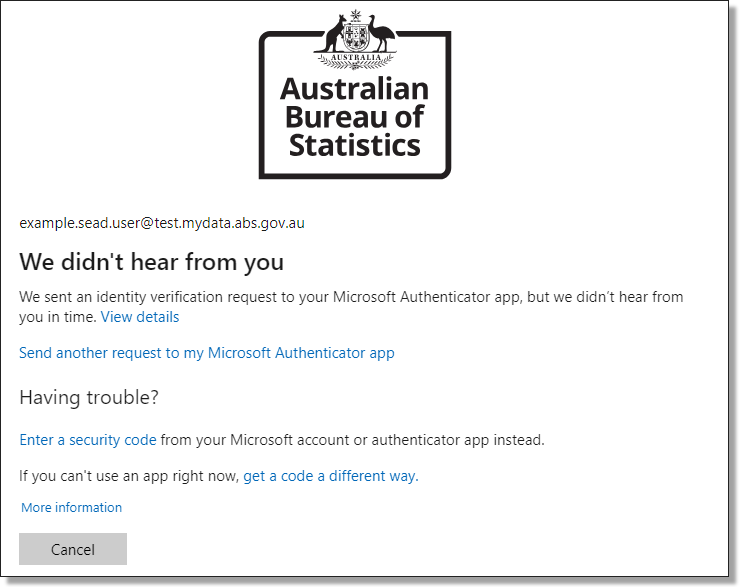
- If you do not approve within the time limit, click ‘Send another request to my Microsoft Authenticator app’. If the request expires, re-enter your SEAD email and password in the SEAD log in screen.
- After you have authenticated via Microsoft Authenticator, you will be logged into the SEAD portal.
Log in to the SEAD portal using your passkey
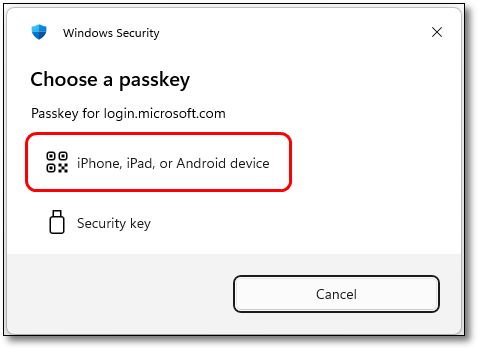
- If you have registered a passkey, you will be prompted to sign in using your passkey after entering your SEAD credentials. On the 'Choose your passkey' window select 'iPhone, iPad, or Android device'.
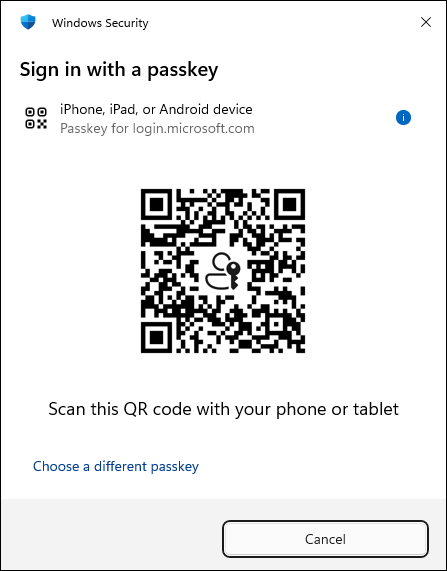
- You will be presented with a QR code. Scan the QR code using your devices camera.
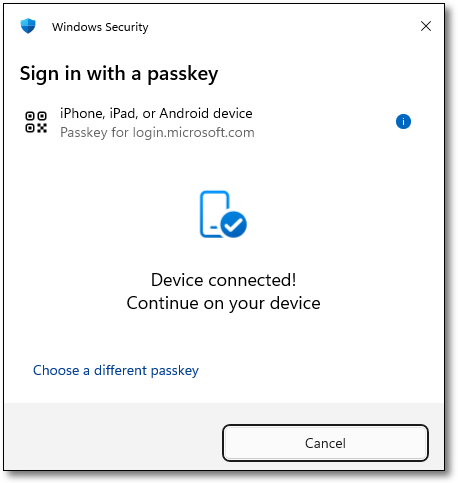
- Once the QR code has been scanned you will be notified that the Device has been connected. Complete the remaining sign in steps using your mobile device.
- After successfully completing the passkey sign in steps on your mobile device you will be redirected to the SEAD portal.
Recommended browsers
The SEAD portal is assessed via a web browser, whereas the SEAD virtual machines are accessible via Windows App or AVD Remote Desktop Client. To access the SEAD portal, it is recommended to use the latest version of any of the following:
- Chrome
- Microsoft Edge
- Firefox
- Safari
Internet Explorer is not recommended.
Note: Mobile devices are not supported/enabled for SEAD.
Forgotten your password
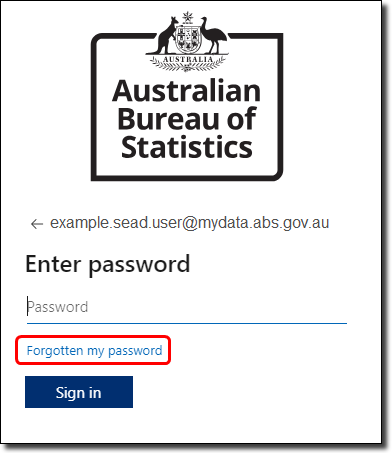
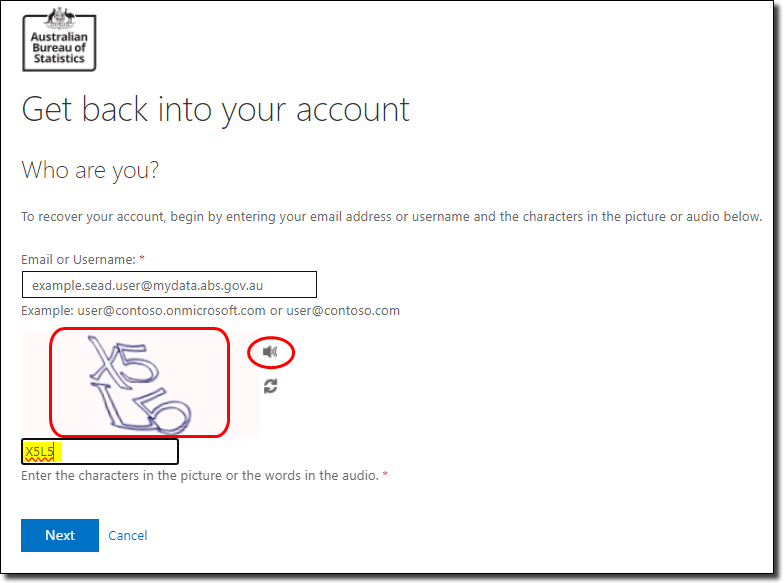
If you have forgotten your password, click the 'Forgotten my password' link on the password entry screen.
On the following screen, you will be asked to enter the characters in the picture. You have the option to hear the characters in the picture if you click on the speaker icon (circled). Your user ID is populated for you.
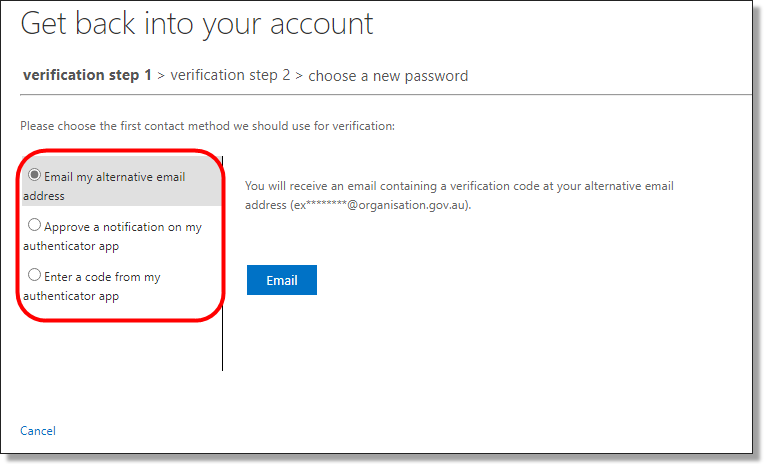
The next screen takes you to verify your account. Choose from the options in the left-hand column.
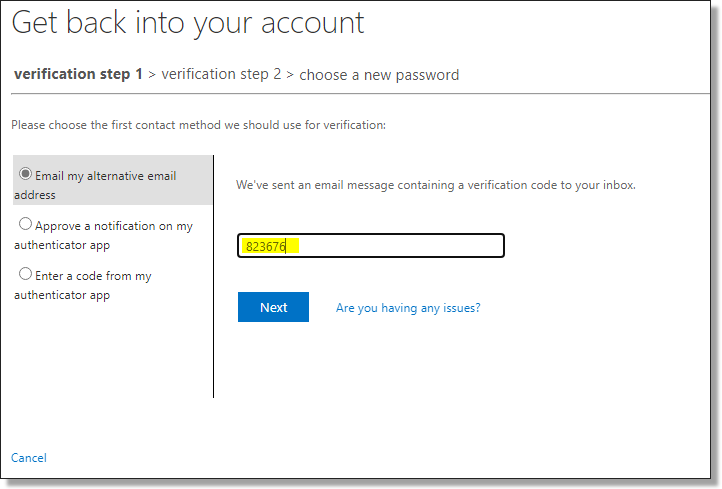
Enter the verification code you received via email, or using the codes via the Microsoft Authenticator app.
Enter your new password, ensuring it has a minimum of 8 characters and contains at least three of the following:
- Upper-case letters A – Z
- Lower-case letters a - z
- Numbers
- Special characters @ # $ % ^ & * - _ ! + = [ ] { } | \ : ' , . ? / ` ~ " ( ) ;
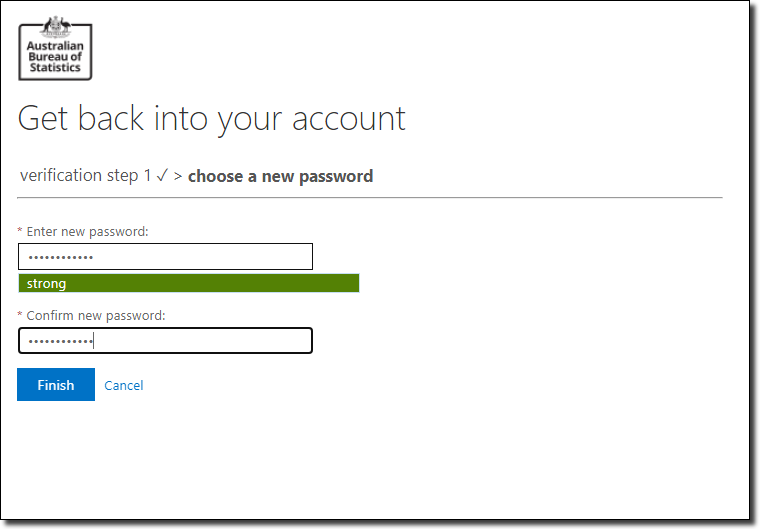
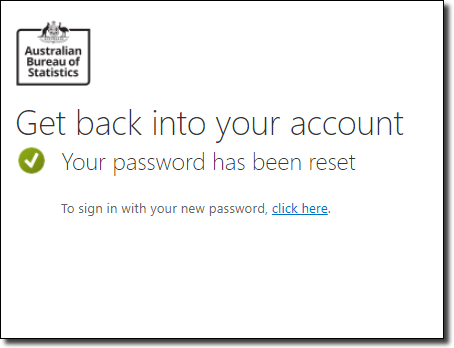
The following screen is displayed once your password has been reset. Select the ‘click here’ link to sign in with your new password.